Posts Tagged ‘bra’

The finished Bra, as promised

I’m a bit late posting this but better late than never.

Here are the materials I used.  The elastic/straps etc on the left is, from top to bottom, wire channeling, 1/2″ band elastic, 3/8″ band elastic, and fold over elastic.  The fabric on the right, from top to bottom, power net and simplex.  This photo was taken after the bra was finished and I didn’t have any of the strap elastic left to photograph and the rings, sliders, hook and eye closure were already attached.  I’m sure most women know what these look like though as they are standard on just about every bra.
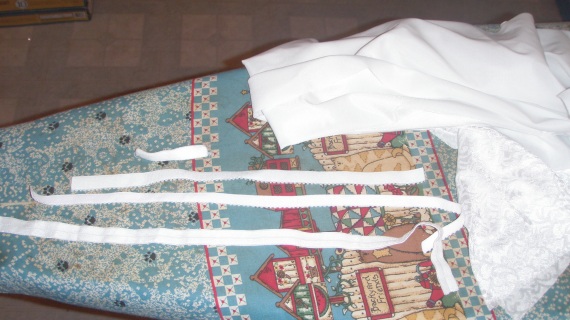
P6290077

I finished making up my bra, using a pattern made by copying a bra that already fit me, about 2 weeks ago.  I was a bit engrossed in what I was doing so I don’t have any progress photos of the bra going together and since I wasn’t using a commercial pattern there weren’t any directions for me to follow so I just did what felt right. 🙂

I first put the cup together.  I pressed the seam open and then top-stitched on either side to hold it flat.  If you are using a lace or other ‘scratchy’ material, you can stitch a bias strip of tricot over the seam when you do the top-stitch, or there is a pre-cut tricot tape that you can buy for this purpose.  I then attached the sling and the straps.

Next I stitched the band together.  I didn’t top-stitch the seam because I knew from my old bra that once the elastic was on, the band is almost non-existent so I figured it wouldn’t matter.

Then I stitched the cups to the band.  I stitched one edge of the wire channeling to the stitching line of this seam so that when it was folded over it would encase the seam.  I then top-stitched around the seam to catch the other side of the wire channeling making sure to just catch the edge of it so the wire would slip in easily.  I then attached the wider band elastic to the bottom of the band.  I flipped it to the inside and topstitched it.  I used a zigzag for this part, everything up to this point was done with a straight stitch.

Next I used fold over elastic to finish the top edge of the cups.  I did a satin stitch over the center front to make the wire channeling secure.  I put the wires into the wire channeling and then used the narrower band elastic to finish the upper band/underarm portion of the cup.  The band elastic and fold over elastic both extended up the strap to finish the edge.

I folded over about 1/2″ of the strap around the ring for the strap.  I stitched and backstitched several times to make sure it was secure.  Then I cut a piece of strap elastic and attached one end to the slider, then threaded the other end through the ring and the slider so the elastic can be adjusted.  Next I attached the strap elastic to the back of the band, attached the hook and eye closure and done!

I know pictures would really help to explain all that but I’m sure if you took a close look at at the construction of one of your bras, this should all make sense.  😀
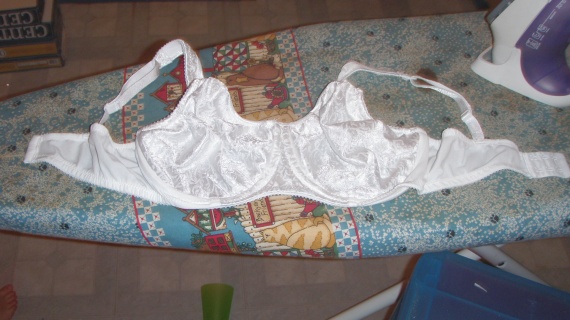
P6290075

Some thoughts on this project.

I should have either doubled the fabric on the bottom half of the cup or lined it with some non-stretch tricot or interfacing.  I think it’s  a common misconception that bra fabric should be stretchy but in reality the less stretch, the more support.  While this bra fits me well, I find that the cups have a tad more ‘give’ than I would like so if I do this again, I will make sure to lessen the stretch for at least the bottom portion of the cup.

I have some adjustments to make to this patter.  In some areas I added seam allowance that wasn’t necessary due to the way the edge was finished (ie. the top edge of the cup and straps since they were finished with fold over elastic which does not need seam allowance.)  I may not have positioned my grainlines quite right so I’ll be revisiting that when I make this again (and yes, I will make this again!)

Give this a try.  If you are a fairly experienced sewer then this really isn’t a difficult project.  The fabrics are easy to work with and once I sat down to put it all together it only took me about an hour (that’s with both kids home and some ripping out/restitching).

I highly recommend going to www.bramakerssupply.com to buy your stuff.  There are several other places to purchase your materials including your local fabric store, but I’ve yet to come across a more complete shopping experience.  You can even buy a kit with enough fabric in it to potentially make 2 bras but not only that, they want you to be successful in your bra making adventure so the ladies that work in the shop are also there to guide you through the process.
Bra making 101-making the pattern

I am about to go into an area of sewing that scares me for some reason.  Making simple pieces of lingerie is no biggie, I mean, a couple triangles and elastic…voila! lingerie.

This, however, goes beyond that.  This is bra making.  That one item of underthings that 99% of women rely so much on that they would spend hundreds of dollars on each year alone.

I had gone fabric shopping in Hamilton, ON with a friend a few weeks back.  If you have been following my posts you may remember my mentioning this trip.  We stopped at The Bra Makers Supply, a tiny ‘shop’ in an office like setting that was like a candy store of fabrics and bra notions and findings.  It was fun and at the time Beverly had me feeling very comfortable, even excited, about this little project I wanted to do.

I think I left things too long and I’m nervous about it again.  So tonight I finally decided enough is enough and I have to just do it.  So the pattern is done and the fabric is cut, there is no going back!

I had originally intended this for one single post but have since realized that it would be one really, really big post!  So I’m going to break it up and hopefully that will keep me motivated to finish.

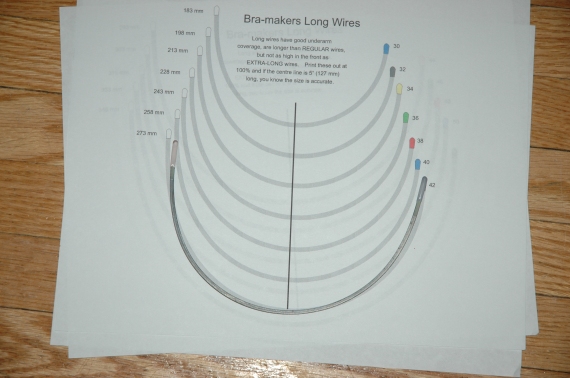
Here’s how I did the pattern.  On the advise of Beverly, I did not take my old bra apart.  Instead I clipped the elastic from the top of the wire casing of one side so I could take the wire out.  I then printed off the wire chart from The Bra Maker’s Supply website so I could compare the size of the wire and then if this foray into bra making is a positive one, I can easily order new wires and keep making bras!

DSC_0258You can see that the wire from the bra is a 42 long.  Obviously this doesn’t correspond to the tagged size of the bra since it was a 36D.
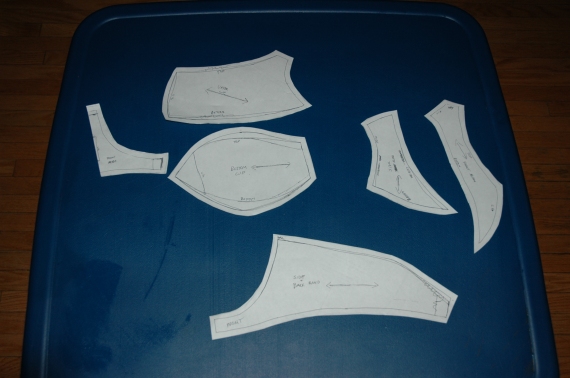
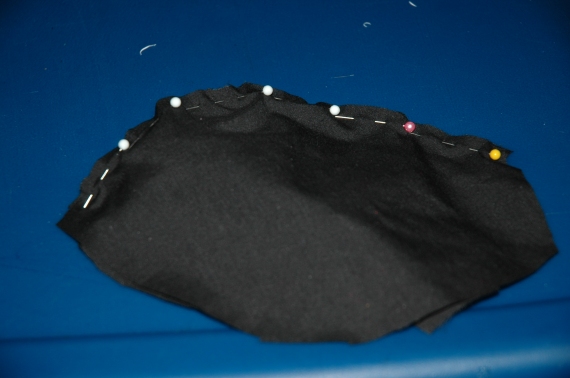
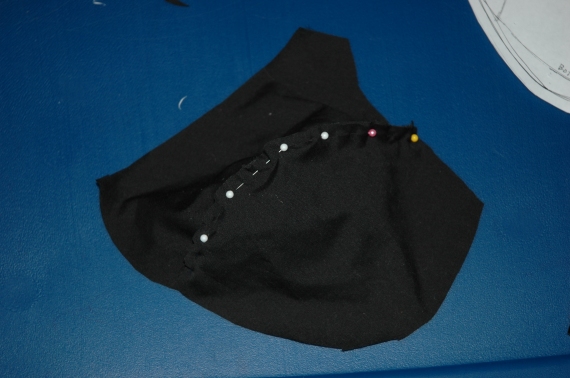
Beverly suggest this next step be done on foam core board but I did it on my ironing board.  I used 81/2″x11″ sheets of regular paper to make the pattern.  Then I placed the wireless cup on the paper and carefully pinned around the edges of each bra section.  This was actually a little trickier than I assumed it would be but I did the best I could.  I lost the photo’s of this process but basically what you do is lay out your un-wired bra cup on a piece of paper on the foam core board.   Then you place pins around the perimeter of each section of the bra.  The bra may need to be stretch slightly to get the appropriate shape.  When you remove the pins there will be an outline of the section which you then make into your pattern piece.

I then measured certain areas of each piece to compare to my new pattern pieces.  I made just a few corrections so this seemed to be a fairly acurate way to make a pattern.  Alternately you can very carefully take apart one cup of your bra, lightly press (without stretching) and just use that for your pattern pieces.  Grainline needs to be marked as well.  This can be tricky if your bra is not made from a fabric that has an obvious grain line. From what I can tell with my bra, the grain goes in the width-wise direction of both the top and bottom of the cup. From searching online about grain, a couple of places show the grain going width-wise for the bottom cup and lengthwise for the top cup.  I can only assume that this depends on your fabric and style of bra so be sure to check yours carefully if you plan to attempt this.

DSC_0246

Once that was done I added 1/4″ seam allowance and cut out my pattern pieces.  The shapes looked weird to me so I cut out the cup pieces in a scrap of broadcloth I had and pin basted just to make sure that it actually made something that resembled a bra cup.  Everything seemed to be fitting just fine so I again double checked all my measurements to be sure the pieces would fit when they were sewn together.

DSC_0252

DSC_0256

I gave myself the green light and cut out my pieces.  I made sure to match my grainlines (which I’m really hoping are correct) and now all I need to do is sew everything together. 🙂

Remake, Redo, Reuse

Perhaps I’m just inspired by earth day, or maybe I’m just inspired in that ‘special’ way but I’m in the mood to recreate stuff.

I’m in a craft show this weekend called Bloomin’ Earth and it’s at the Kitchener Market downtown.  It’s actually more of a earth-day festival and you can get all the info by clicking on this link – BLOOMIN’ EARTH.  The whole show revolves around handmade and the three R’s (reduce, reuse, recycle) so it’s going to be a great show for all ages.

I make a line of kids clothing called Punkn’s Alternative Clothing.  I take a combination of new and recycled fabrics and findings and turn them into really cute onesies, t-shirts, bibs etc and that’s what I’ll be selling there.

Anyhow, on to the real subject of this post.

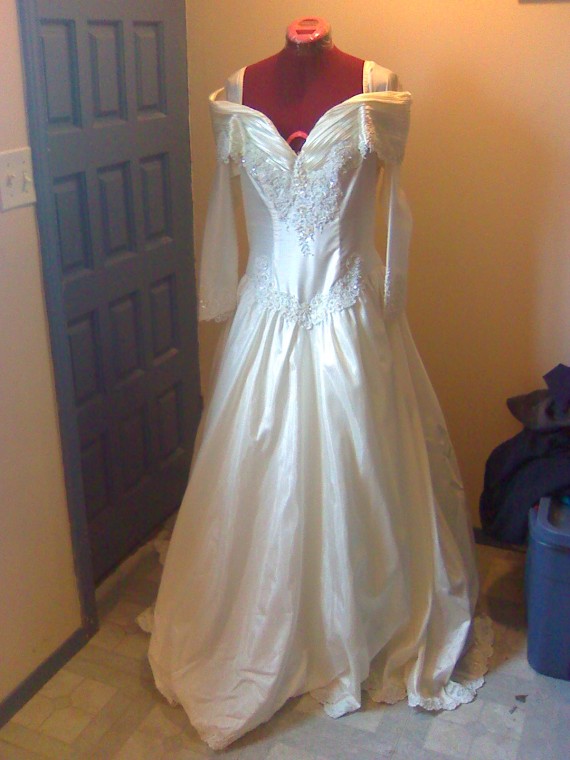
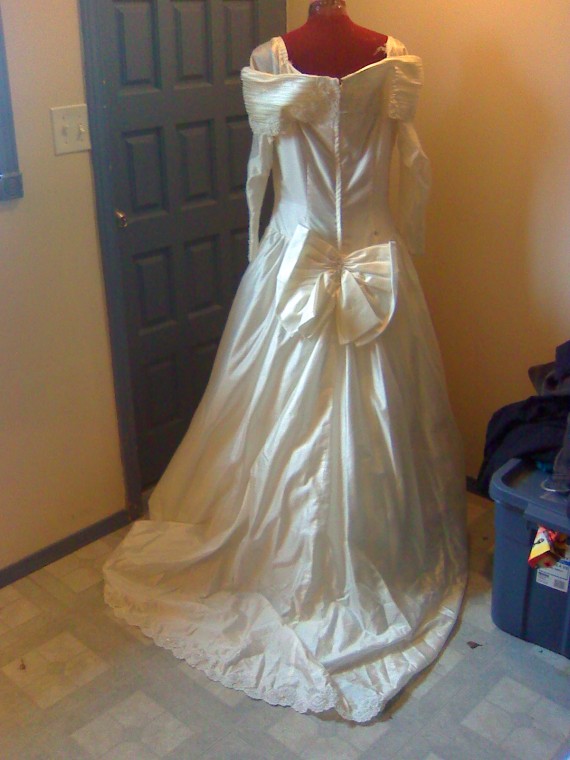
I was recently emailed information about a competition and a photo shoot opportunity.  Two separate events but the subject is the same.  They are looking for remade wedding dresses.  The photo shoot is pretty loose as far as what they are looking for and for budget.  They want some designers to take an old thrift-ed wedding dress and make it into something edgy and high fashion.  The competition is similar but more rules.  They have three photo’s posted and each entrant is to use one of those photo’s as inspiration for their re-design.  The budget is $75 and that includes the cost of the dress.

I was lucky enough to have a wonderful person from Kitchener Freecycle donate a dress to me.  (if you aren’t familiar with Freecycle, you can check it out here to find your local chapter: http://www.freecycle.org/)  Now I just need to sit down and decide how I’m going to remake it.  I plan to use only things that I already have and keep my budget as close to $0 as possible since the amount spent on the dress is one of the judging criteria.  I will try to take pictures as I progress and post them here for you to see.  For now, here’s the dress in it’s original glory.

0422090833a0422090833c

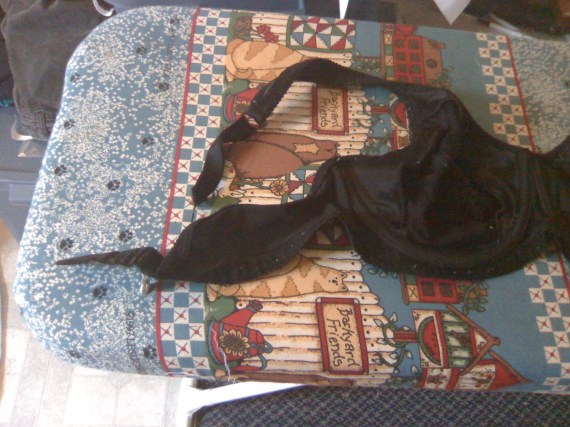
My other new project is sewing a new bra.  I hate bra shopping.  I am the type to go maybe once every three years to buy a new bra because once I’ve found one that fits, I don’t want to try on any more.  (Usually about that time my kids are running around like crazy people, hiding in the displays and sneaking peeks in the change rooms so you can understand my haste in bra shopping or any shopping for that matter)  Well, the last one I bought was so nice and comfortable you can imagine my dismay when I pulled it out of the washer and the strap was no longer connected to the bra.  And I know what you are all saying, but when you have to do at least one load of laundry each day, sometimes 2 or 3, ‘hand wash’ and ‘lingerie bag’ are just not part of your vocabulary. You can see the damage in the picture below.

0422090834a

So, yesterday my friend and I made a trip to Hamilton.  We were told about how great the fabric shopping is there and all the deals and such so we decided it was time to check it out.  Before I left to pick up my friend I went online to check out the fabric shops so I knew exactly what area we were going to.  One of the sites that came up was The Bra Makers Supply.  Now, I’ve been to their website before and always wanted to buy stuff from them to try making my own bra but I hesitated because I didn’t really know what I needed and how much.  Well, to my suprise and delight, they are located in Hamilton!  I plotted out their location so if we had time, we could stop in and check it out.

The first thing you notice about Bra Makers Supply is it’s not your usual fabric store.  Infact, it’s located in more of an office setting.  All the bra findings, notions, fabrics and patterns are neatly laid out on the shelves.  The woman that helped us was Beverly Johnson.  If you don’t know the name, she is the expert at making bras.  She owns the shop, she has written manuals, she sources out the best patterns and supplies, she designs bras and she teaches classes.  She let us wander around and check things out for a bit and then approached us to find out what we were really looking for.  So I explained my dilemma and that although I could just reattach the strap to my bra, I felt it might be time to consider re-making it since it was obvious that it’s getting time to retire it.  I had tried to make my own from a pattern once and it was not good.  For some reason the idea of making a bra from scratch was extremely intimidating.  Mostly it was the fitting process and the lack of available notions.  Did you know that there are three standard lengths of wire and that you can get them in plastic?  Me either.  I’m pretty sure Fabricland just has one length and only in the metal wire type.  They also have around 100 sizes of bra patterns (yeah I was a bit stunned to hear that too).

Remaking a bra using one that I knew fit seemed less intimidating.

Anyhow, after discussing my old bra and what I was looking for in my new bra she helped me pick out fabric and make sure that I had all the proper notions.  She even told me that if I was having trouble I could call or email them, or if at all possible, I could come in with my bra and sewing machine and she would help!  That last part floored me.  When was the last time the staff at the local fabric store told you to bring all your stuff in and they would help you if you had trouble putting your sewing project together?

So I made a decision that I would try this.  I purchased everything that I needed in order to make one bra and it cost me just under $25(that’s with taxes for all you Ontario readers).  I have enough fabric though to potentially make 2 bras so if the first one works out I can either go back or order the findings from them online to make a new bra.  They also ship worldwide if you aren’t as lucky as me to live close by.

I’m so excited to get started and I will try to get pictures of the progress of this project too so you can perhaps be inspired to try it yourself, or maybe I can do it for you. 😀

Thats all for now, have a great Earth day, Earth week, Earth year!!