Posts Tagged ‘recycle’

All that glitters…a quick tute to extend the life of a pair of kids pants.

K, so I’m not done the sparkle dress yet, it is cut out and waiting for me to do.  In the meantime I made up a couple of pillows using another sequin fabric we had at work.  I had a bit left over so I decided that it would be great for fixing a pair of my daughters pants.

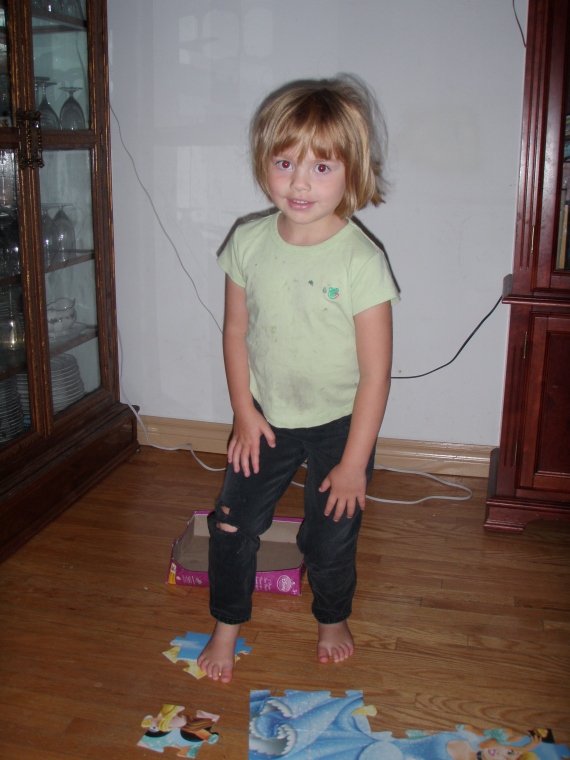
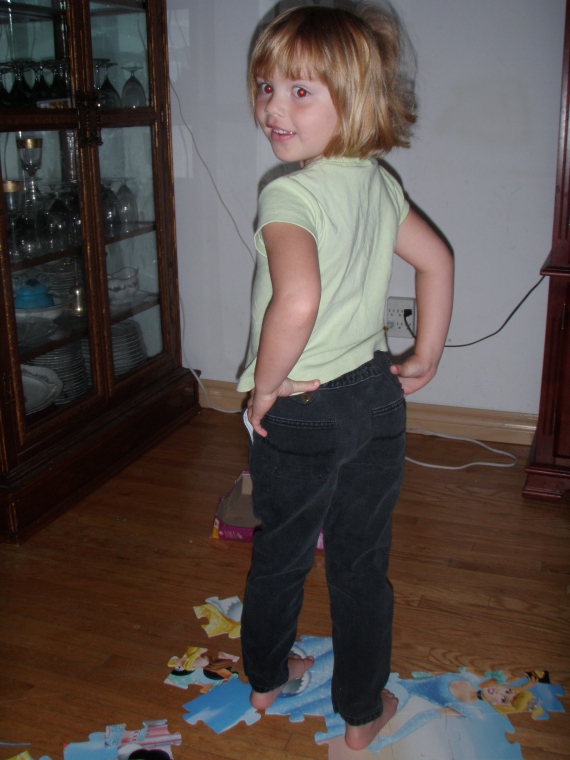
She got a pair of jeans from the Salvation army a few months back during one of their dollar sales.  She loved them, wore them all the time and then the inevitable happened.  She got holes in the knees.  The pants were starting to get a bit short anyhow but they still fit in the waist.  Fixing them wouldn’t be a problem since the style already had a seam right around the knee area so all I had to do was cut of the legs at the seams, use the cut off bottom portions as pattern pieces and add new fancy bottoms to her pants!

Here’s what I did, you can adapt this to any pair of pants and the fabric you choose can be gender appropriate of course.

Materials:
Old jeans
Scissors
fabric for new pant legs
iron

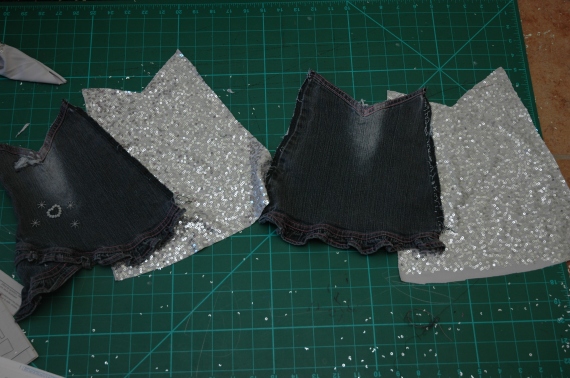
I split the pants up the side seam and trimmed the leg off at the seam that was at the knee.   If your pants don’t have this particular seam (and they probably don’t since this is purely for design) just cut off the pant leg slightly above the knee (or just below would work too) so the seam doesn’t run directly across the knee.  Nothing is more uncomfortable than a line of bulky fabric right across the kneecap.

DSC_1124

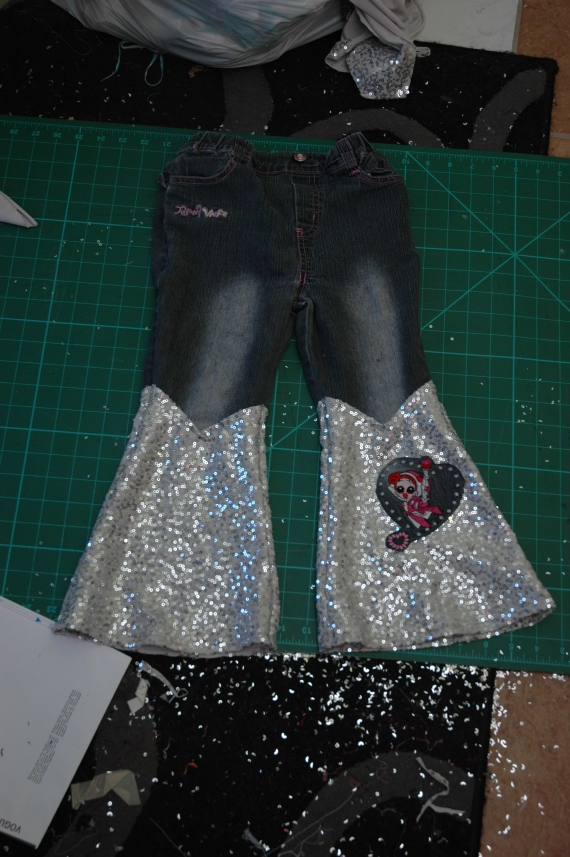
I was instructed to keep the little embroidered girl on the right leg so I cut it out to put it back on the new leg as an applique.  Next I ironed the jean pant leg so the seams were out flat.  Then used it as a pattern piece to cut out the new legs.  I added some length to the new ones while I was at it so she could get some more time out of the pants.

DSC_1127

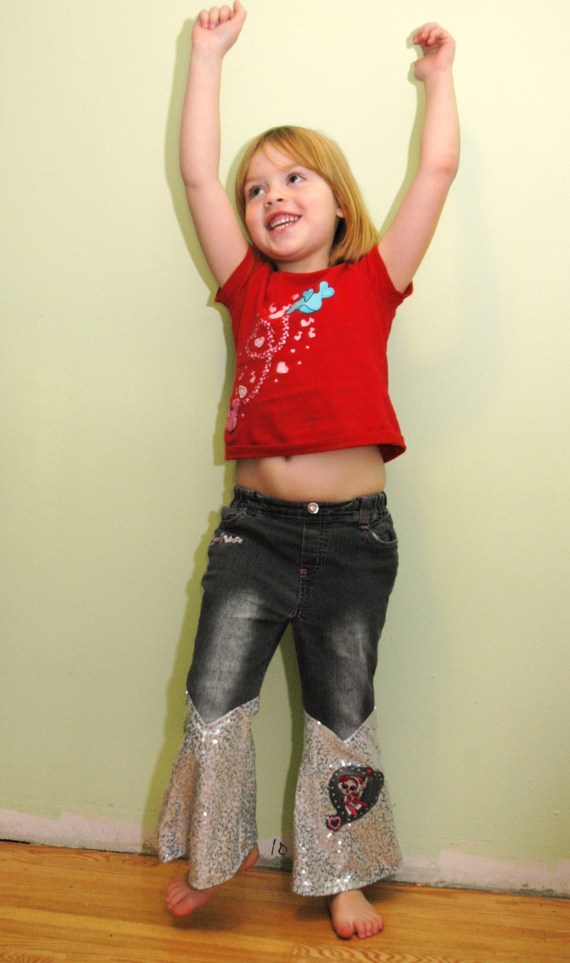
Then I just sewed the new pant legs on, sewed up the side seams and hemmed them.

DSC_1128DSC_1166

Some thoughts on this project:

The type of fabric you use will determine the final look of the pant.  Choosing a more casual fabric would have given the pants a more casual look.  Choose your fabric based on your child’s favourite colours, prints etc and try to choose something that is similar to the pants fabric.  The fabric I used was a thicker knit but the jeans had a lot of stretch to them so the two fabrics actually worked out well together.

This works for boys pants too, just choose fabrics more suited to your little man.

This is a great way to reinforce knees too.  create a double layer of fabric across the knee and a single layer of fabric for the lower portion of the leg.

Use your imagination, straight legged pants can become flared leg pants and vice versa.  Just add a strip of fabric an inch or so above the hem if all you need is to add some length and the pant leg is in good shape.

For the Love of Buttons!

I love buttons.  I get excited seeing a jar of random buttons, all the colours and shapes.  I wonder what the buttons were on before they landed in my possesion.  I wonder how old they are, what their purpose was etc.  It’s a strange obessesion really and this morning I found a reason to get my buttons out to use them. 🙂

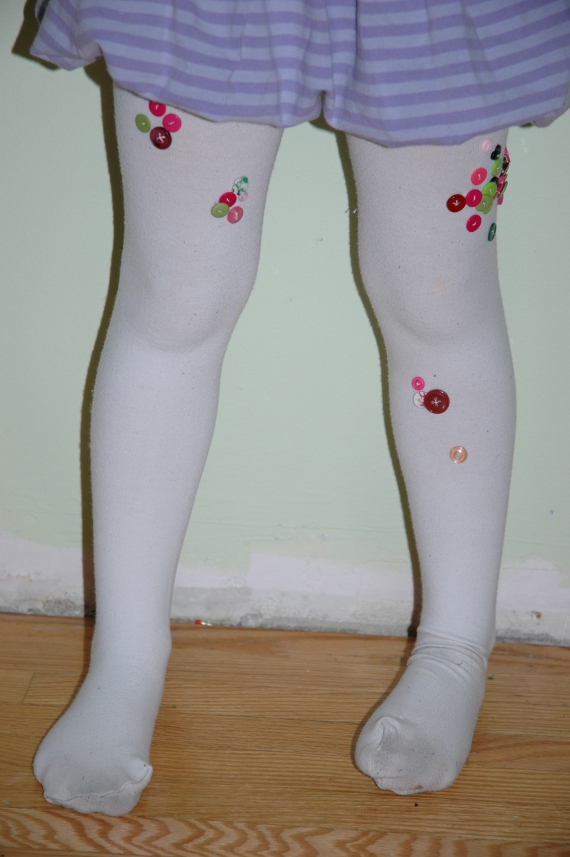
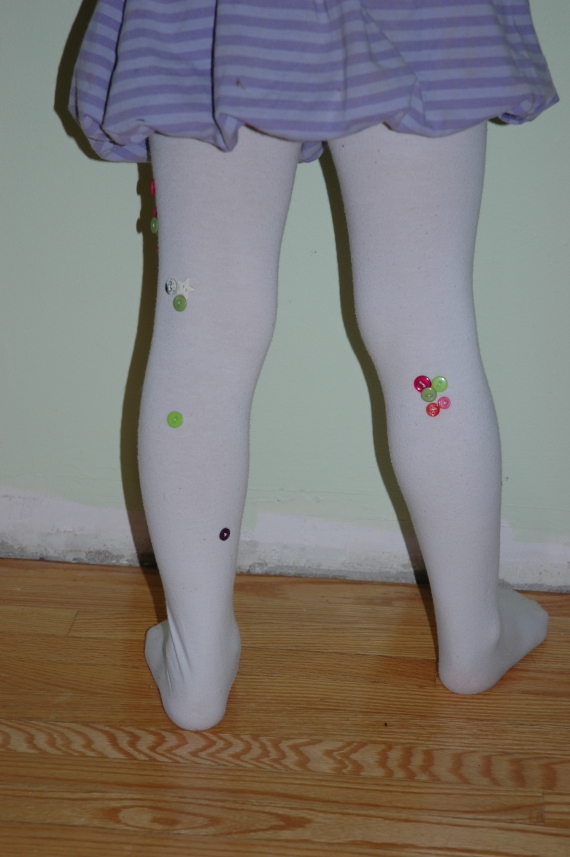
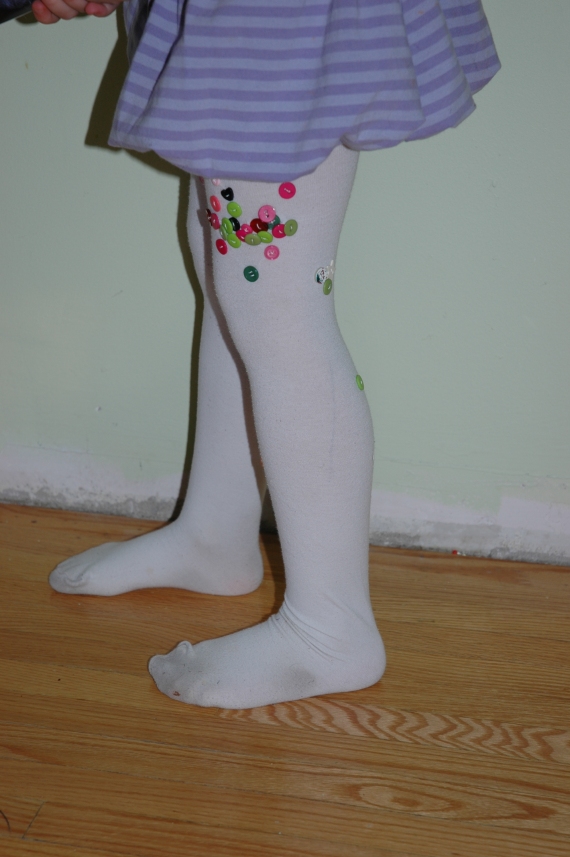
I had received a bunch of clothes from a friend, for my daughter.  one of the items in the bag was a pair of plain white tights.  My daughter wore them the very next day and promptly put a hole in them.

I let her wear them for a while like that and then decided today, as I was doing some mending, that perhaps I should attempt to fix them.  Embellished tights are really popular on the runways right now, though I have yet to really see them on anyone in the normal world.  I felt this would be the perfect thing to fix the hole in the tights and to use my buttons.  I googled embellished tights first to get some inspiration.  Cocorosa’s tutorial had caught my eye a few months back and it was one of the top hits when I did my google search.  Park and Cube has a cute one too.

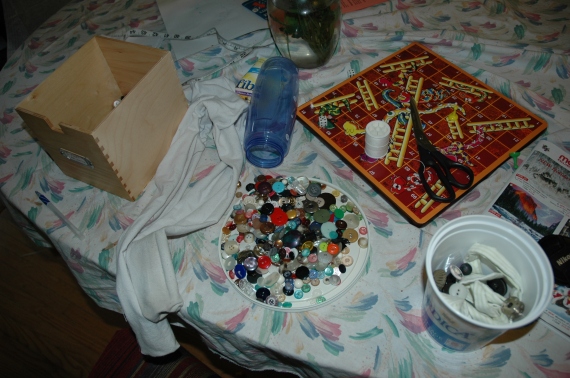
Anyhow, I gathered my materials:

Parker’s tights with the hole in them
thread and needle
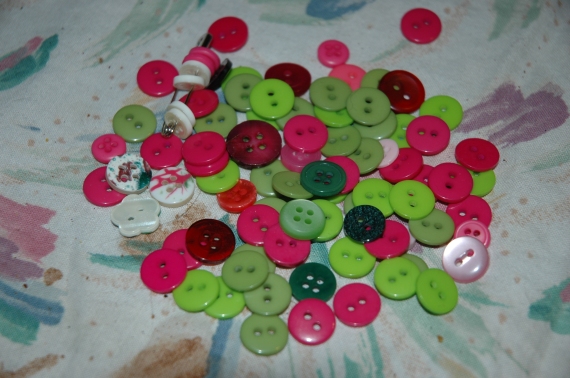
buttons
plastic water bottle
scissors

DSC_1051

I started by sorting out the buttons I wanted to use.  I have a thing for green and pink right now and I had lots of those button colours so I sorted them out and put the rest away for another day.

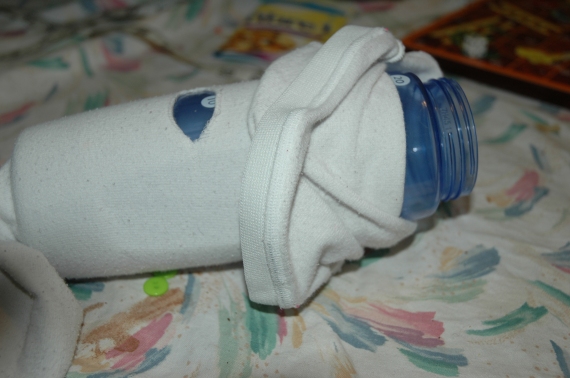
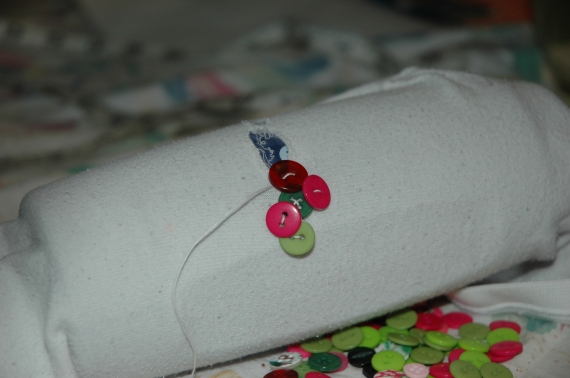
In order to start mending the hole I needed something hard to put in the leg of the tights so that it would stretch it out a bit as well as keep me from stitching through both layers of the leg.  This is where the water bottle came in.  I put it in the leg of the tights where I wanted to put the buttons.  Then I threaded my needle, made a knot and started stitching on buttons.

DSC_1062DSC_1065DSC_1066

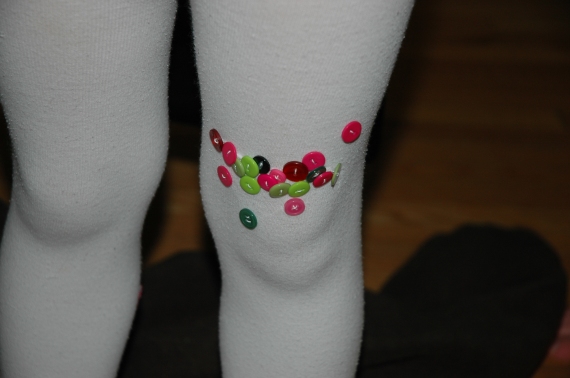
Once I finished mending the hole and had more buttons on the leg I decided to have my daughter try them on so I could see how it was looking.  I then marked some more spots to put buttons.

DSC_1067

And voila! Tights are as good as new and they look pretty cool too!

DSC_1068DSC_1069

DSC_1070

Now that it’s fall, I need swimsuits…

Of course, it’s logical right? It figures, as soon as the temperature drops and the leaves are on the ground I find myself in need of swimsuits for the kids not to mention, I had cleaned out their summer stuff a few weeks ago.  I put away what may fit next year, sorted out what can go to goodwill and what can go to consignment and lastly threw out what wasn’t going to fit and was not in any shape to pass on.  Their swimsuits were in that last category and I thought, oh well, it’s not like they will be going swimming anytime soon.  yeah. right.

My in-laws have generously paid for swim lessons for the kids.  We registered them at the beginning of the week.  Their first lesson is on Saturday, it’s now Thursday and I realized they have no swim suits.  So I set about making them some.

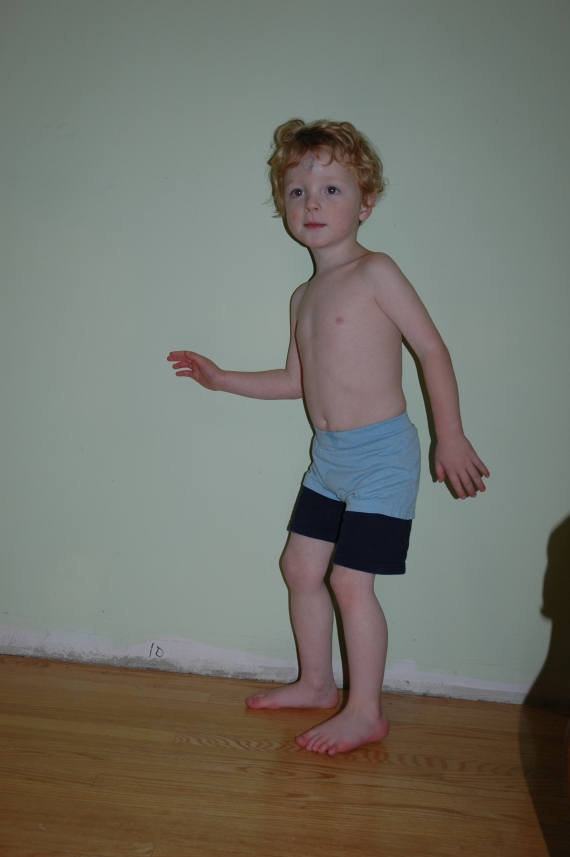
Patrick’s suit was easy.  Remember these shorts? If you missed the post, click the photo.
P6240038

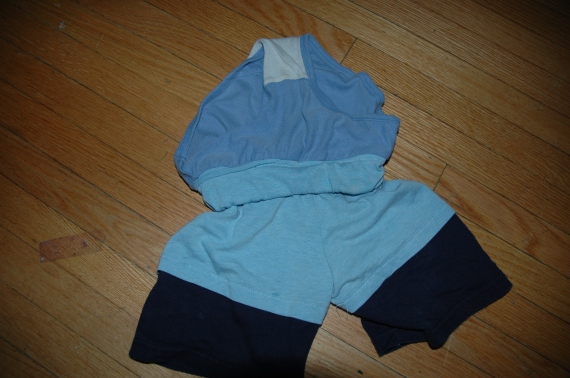
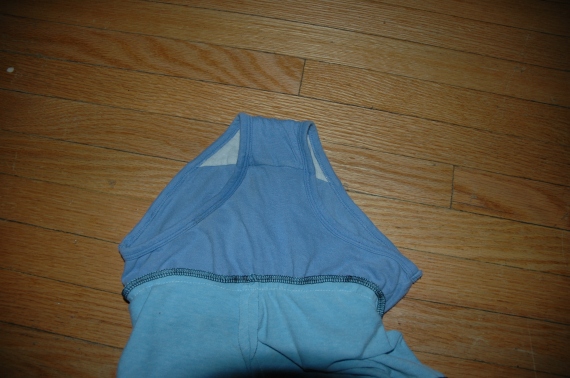
I took a pair of Parker’s underpants and removed the elastic.  Then I stitched them to the waistband of the shorts on the inside.  There. done. swim shorts. lol!

DSC_1030DSC_1047DSC_1050

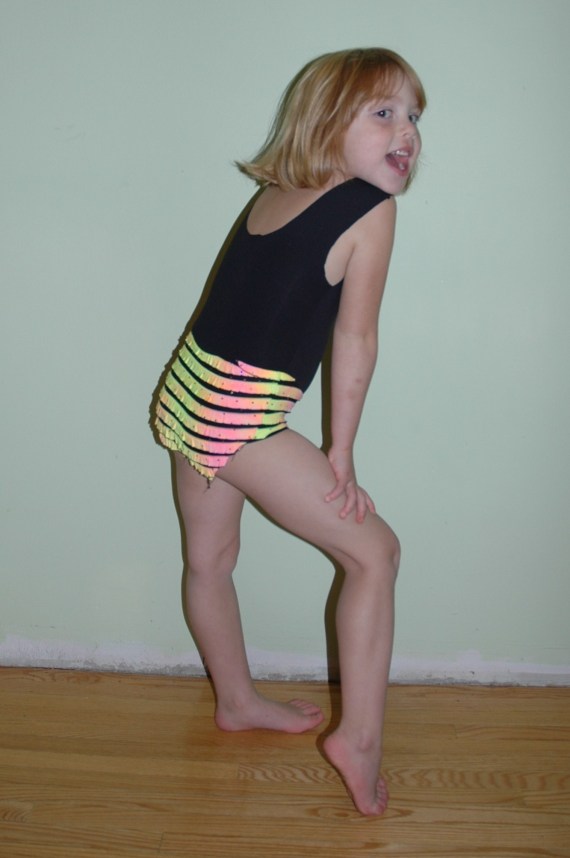
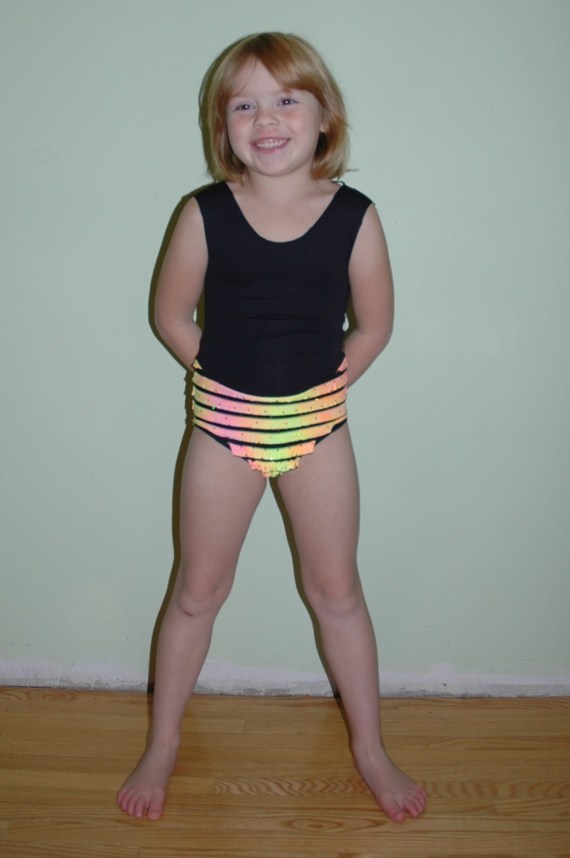
For Parker’s suit I used a kwiksew pattern for a dance leotard.  It’s discontinued but if you are interested in looking it up it’s Kwiksew 2263.  I left the sleeves off and I still have to put some elastic in it but it seems to fit her well and should serve it’s purpose.  I used some black poly lycra knit for the top portion and this ruffled lycra that a friend gave me a small piece of.  I lined the bottom with the same fabric the top was made out of.  I think both suits took about 1 hr to put together (that’s figuring in time to put the elastic in).

DSC_1023DSC_1016

And there it is.  The kids are ready for swim lessons!

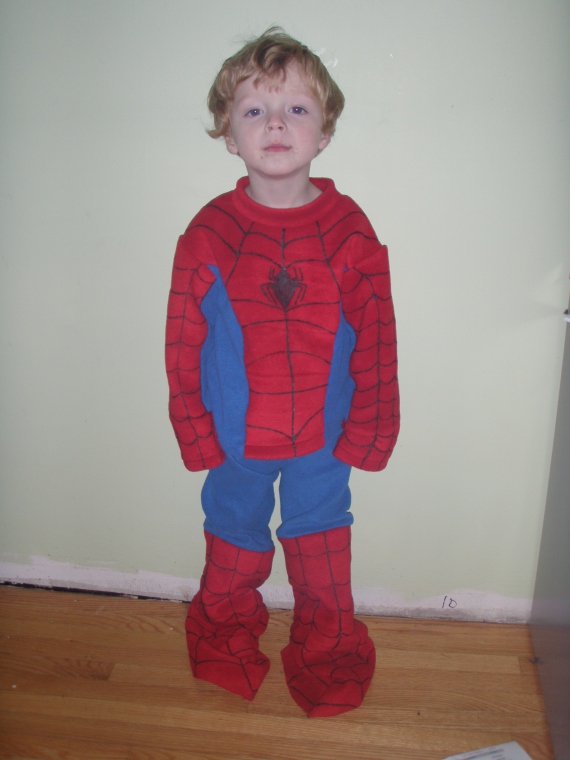
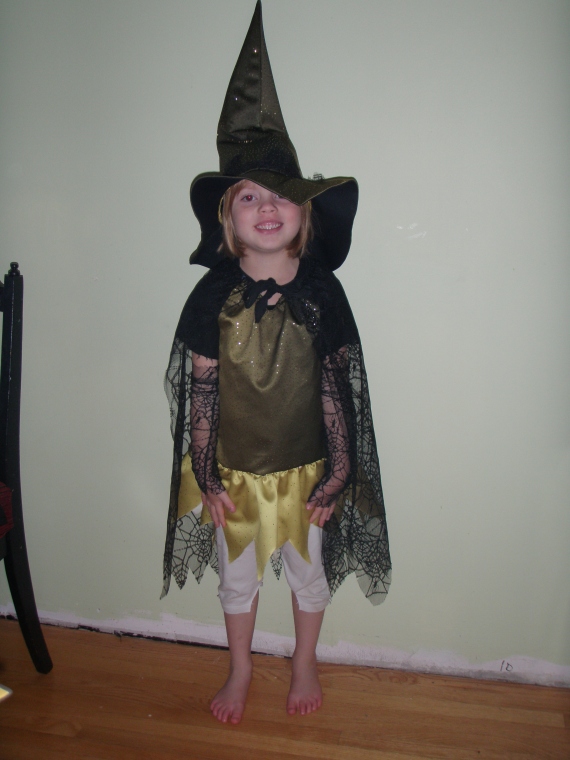
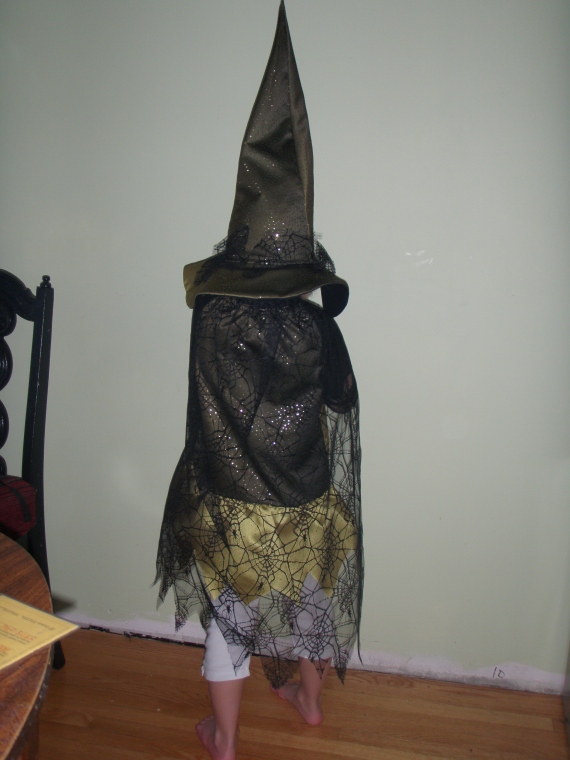
Spider-Patrick and Witchy Parker (thrifty costumes since I hate spending money if I don’t have to)

The Halloween costumes are done! well, almost, I still have to put some elastic in the boy’s spiderman suit but otherwise things are done.

Patrick is gonna be spiderman.  For anyone that knows him, this will not come as a shock.  He is enraptured with spiderman.  It’s gonna be a cold Halloween so I wanted to make his costume warm.

I used polar fleece and a pyjama pattern that had a two piece, footed pyjama.  I had bought a remnant of red fleece at work and decided it was time to part with a royal blue polar fleece sweater that I had purchased at Old Navy ages ago.  I traced out the pattern for the pj’s on wax paper so I could work out the design and not destroy my pattern.

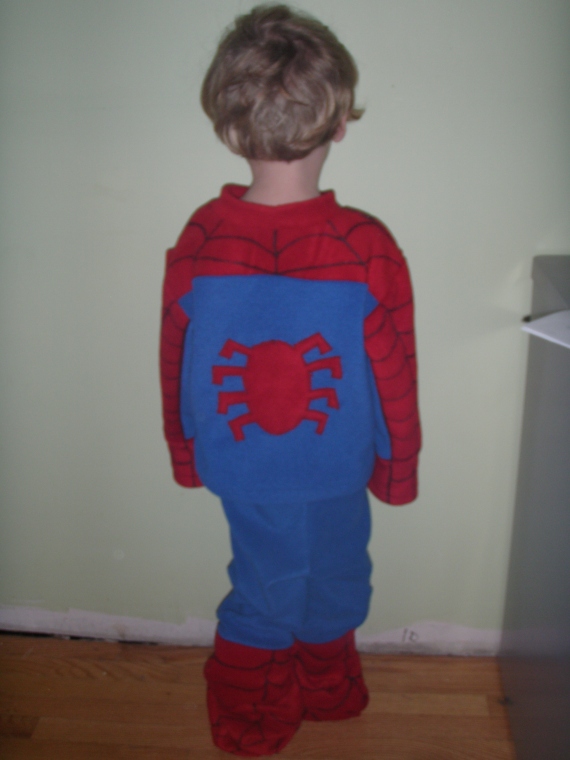
I cut out the blue and red pieces using a spiderman toy as guidance.  I then pieced everything together and other than sewing on the applique and doing the hems, I did everything on the serger.  I then used black paint to re-create the spiderweb design.

Since I’m planning for him to wear this overtop of his shoes, I left the sole off the bottom of the pj feet.  After Halloween, I’ll sew the soles on and he will  have nice, warm spiderman pj’s! (The pants will fit better once I have the elastic in the waist and ankles).

PA180049

PA180050

Parker decided she was going to be a witch.  I had some variegated green satin with gold sparkles on it that was leftover from a dress I made a few months back.  I made her a witchy dress from that and a hat as well.  I bought some spiderweb fabric from work ($1.99/meter! and I only needed about .6 of a meter)

I used the spiderweb fabric to make a cape, sleeves and decoration on the hat.  I’m going to have her wear a long sleeve shirt and pants with her costume so she wont’ freeze to death but I don’t think that will detract from the outfit. 🙂

PA180052

PA180053

All in all, I think I spent under $10 bucks total to make these. 

Cost breakdown:
Green satin fabric- $0 (on hand)
Blue fleece sweater- $0 (on hand)
red fleece remnant- $3
spiderweb fabric – $1.50
black paint – $0 (on hand)
interfacing for the hat – $1 (clearance)

Even if I had to pay for all the materials I probably would have spent between $15 and $20 dollars total.  Not too bad considering the costumes in the store are about that much each. 🙂

How to squeeze one more year out of a kid’s t-shirt

So my Daughter started school today and was very excited about it.  She got herself dressed but when she came downstairs I noticed the shirt she was wearing was about 3 inches too short in the arms and body so in addition to her belly hanging out, she looked like she had gorilla arms! lol!  That and she had obviously worn this while painting one day and it was covered with little paint spatters.

I had her change her shirt and off to school she went.  When I got home I decided to see if I could get one more year out her shirt.  She has three of the same shirt (my mom found them on sale for a buck somewhere) and I knew they would all be fitting the same so I took the black shirt and the purple shirt and put them together to make a ‘new’ shirt.

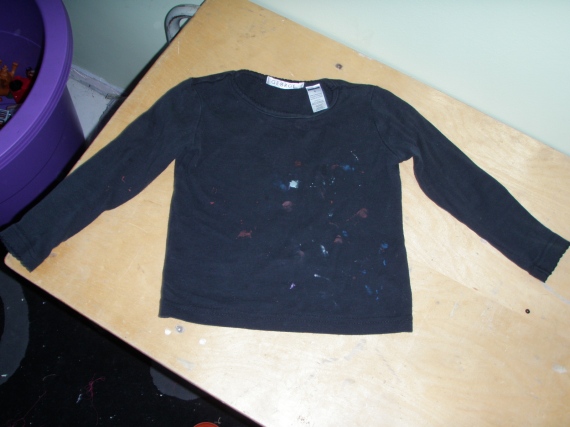
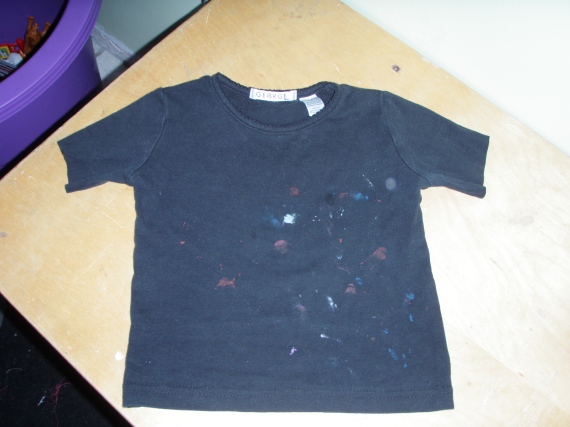
Here’s the black shirt before:

P9090061

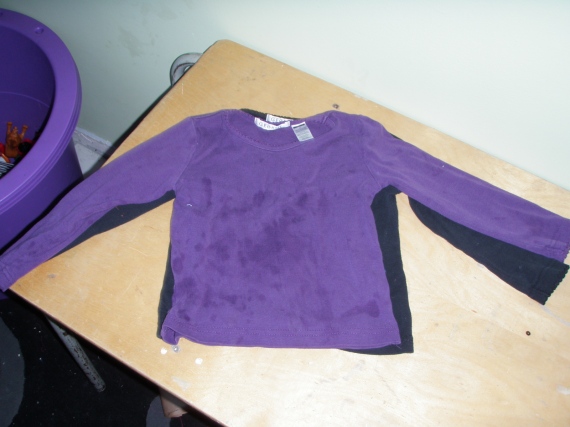
and here’s the purple shirt before:

P9090062

I love how the grease stains on the purple shirt show up so much more prominently in the photo than they do in real life.  Yeah, laundry is not my forte and my daughter has a hard time understanding the difference between her shirt and a napkin.

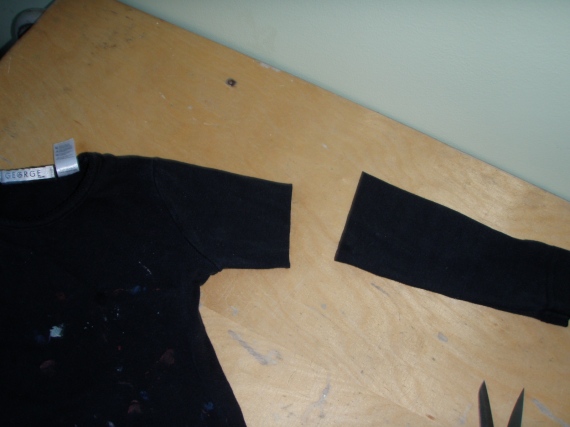
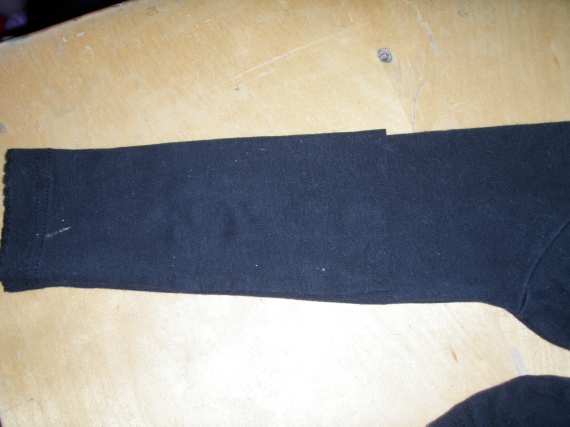
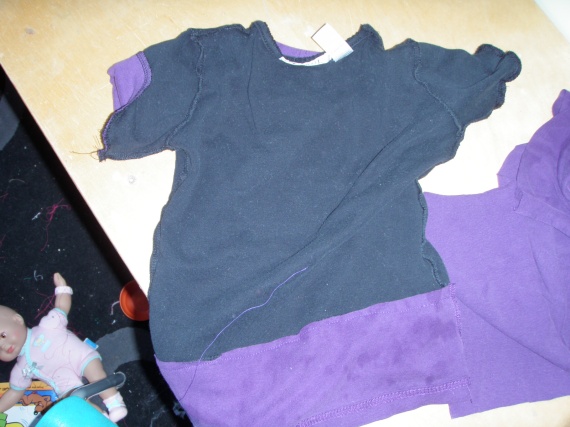
Anyhow, first thing I did was cut the sleeves off of the black shirt.  I didn’t measure anything, just eyeballed it and used the first sleeve cutoff to measure the second sleeve so they were even.

P9090064P9090065P9090066

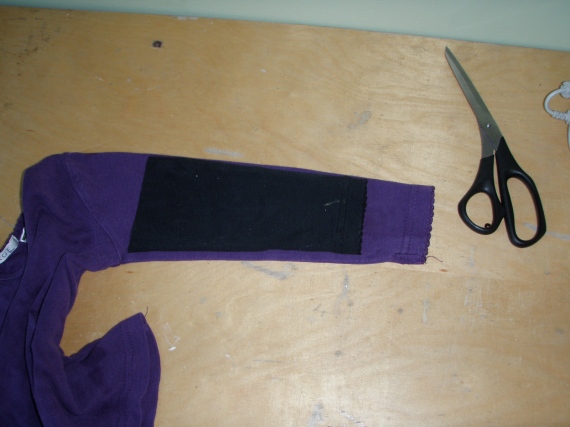
I needed to add about 3 inches to the length of the sleeve which worked out that I could simply cut off the purple sleeves at the underarm point.

P9090067

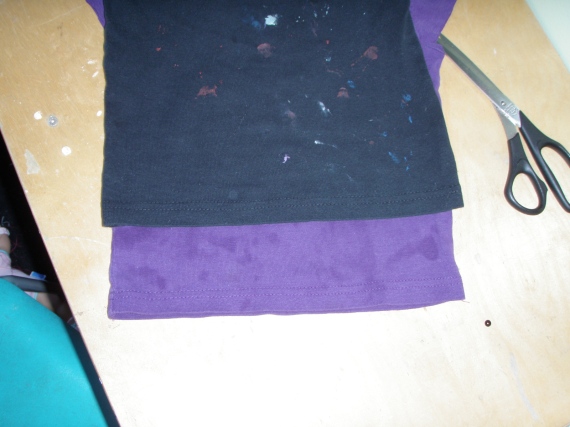
I needed to add approximately the same amount the bottom of the shirt so I cut off the bottom portion of the purple shirt that equaled the length I needed to add plus the hem allowance of the black shirt.

P9090068

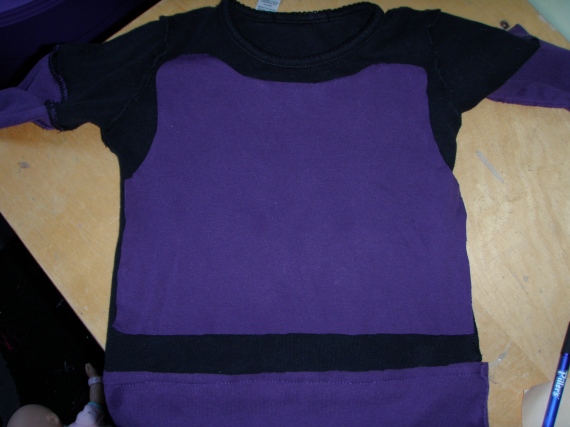
I then inserted the purple piece I just cut off in the bottom of the black shirt, matched the side seams and lined up the cut edge with the top edge of the hem. Then I stitched around the hem of the black shirt to attach the two pieces making sure to follow the stitch line of the original hem.  I used purple thread but you can use a matching thread.

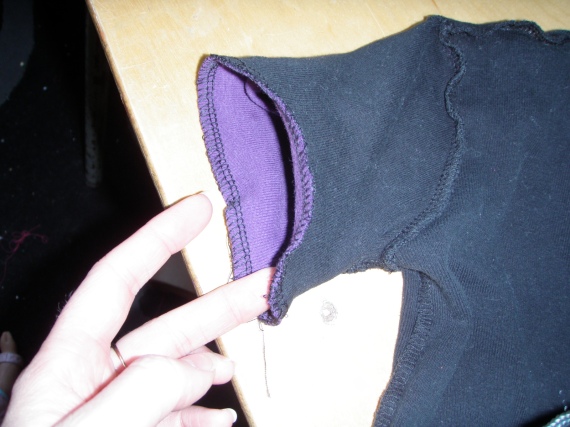
Next I matched up the sleeve edges, right sides together and serged them together.  You can use a straight stitch instead, knit fabrics tend to be resistant to fraying so there really isn’t much need to finish the edges.

P9090069P9090070

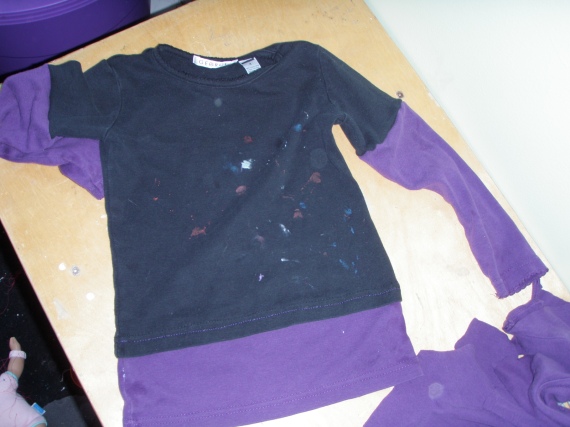
So here’s how the shirt should look at this point.

P9090071

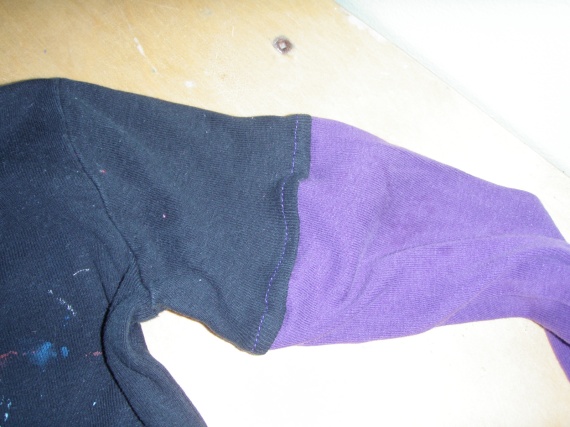
In order to give the sleeves the look of being layered I flipped the seam up and stitched a “hem” around the black part of the sleeve.

P9090072

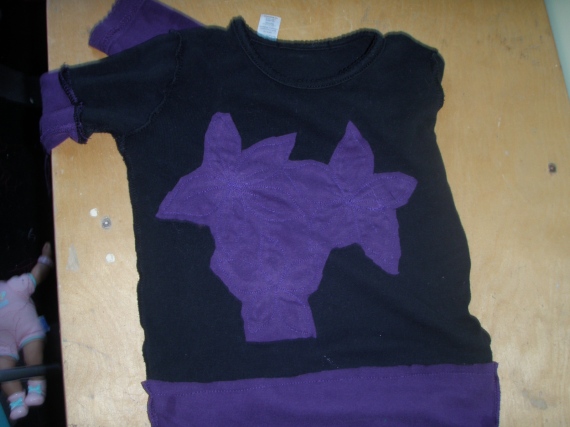
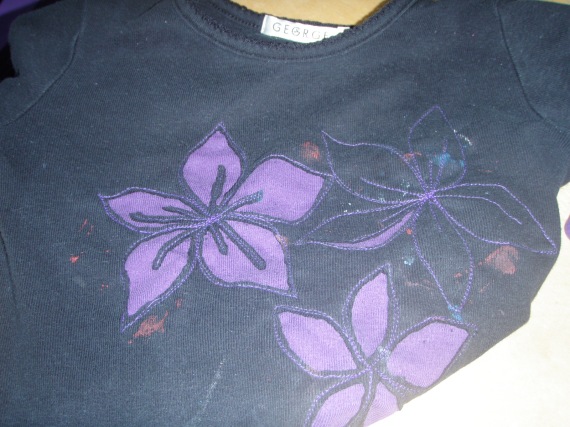
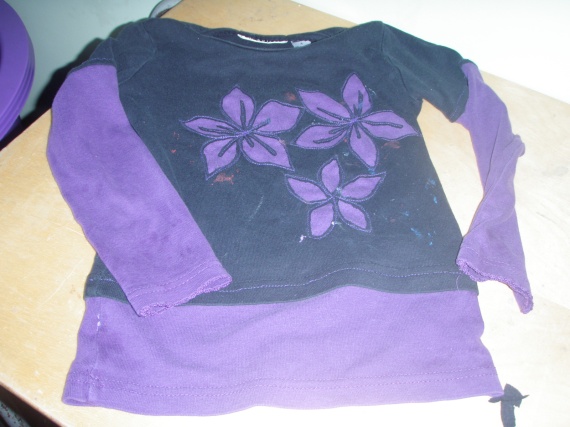
I wanted to try and cover up some the paint spatters on the front of the shirt.  Reverse applique is my favourite thing at the moment so I decided to put some reverse appliqued flowers on the front.  It didn’t completely get rid of the paint splatter but I think it looks very cool now.

I cut the sleeves and front from the back of what was left of the purple shirt.  I used the back since it was less stained and slightly bigger than the front.  I turned the shirt inside out and pinned the purple to the front.

P9090073

Next I turned it right side out again and drew my design on the shirt.  Then I simply used a straight stitch and went around the design a couple of times.

I trimmed the excess purple from edges on the back and then cut out the black inside the petals.

P9090088

P9090089

And voila! New shirt that should last at least one more year before she completely grows out of it.

P9090090

Some thoughts on this project.

To lengthen the sleeves you don’t have to cut the sleeves short, you can just add to the hem of the sleeves similar to how I added length to the hem of the shirt.

If you don’t have enough to lengthen the sleeves, just cut them off and hem them as short sleeves, that way they can’t be too short. 🙂

You can leave the front of the shirt plain, sew on an embellishment, iron on a patch, embroider something, it’s really up to you.  I just really like reverse applique. 😀

Bowling shirt and Skinny jeans tutorial two-fer!

I promised and here it is.  Seriously you will laugh at the ease of these two projects.

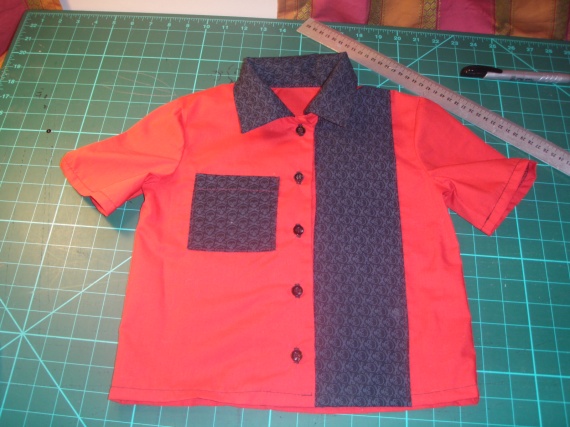
First things first, the bowling shirt. This could work for any size, kids or adult, boys or girls.  My example is a shirt I made for my son.  It’s the same skull fabric I used for his first shirt but it’s white skulls on a black background instead! hehe! Fabric choices are totally up to you but crisp cottons work great for this project.
One thing I want to say on the subject of boys clothing is think outside the box.  We get so caught up with images that we can’t see past them.  One thing I hear complaints about the most when it comes to sewing for boys, and I’ve made this complaint myself, is the lack of boys patterns both in fabrics and in sewing patterns.  I’ve found that a lot of the girls patterns I have for pants, shirts and shorts can easily be transferred to boys with little to no alterations.  The pattern I used for the bowling shirt here is a ‘girls’ pattern but honestly, it’s such a basic pattern they could have easily made this unisex if they had just used a photograph of a little boy AND a little girl, instead of two little girls.  Anyhow, next time you are out shopping for patterns and fabrics for your little man, try to remember that just because it’s a little girl pictured or the sewing sample in the store is ‘girly’ it doesn’t mean that it is just for the girls.

On to the tutorial.

Things you will need:

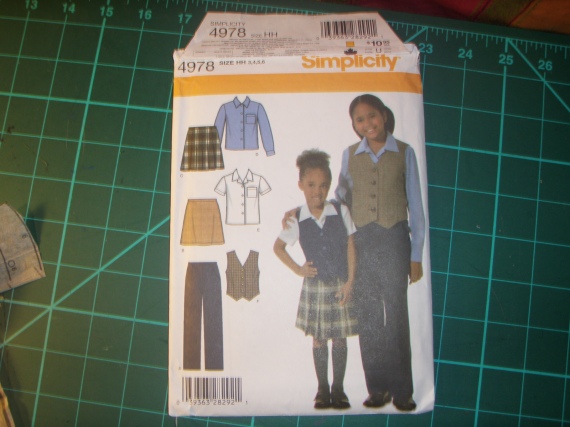
shirt pattern – you don’t want anything too fitted and it doesn’t have to have short sleeves, fancy yokes, pockets etc.  The more basic the better.  I used Simplicity 4978.
Main fabric – in the amounts indicated for the size you are making
Contrast fabric – this will depend also on the size you are making so read the tutorial completely and you should have a better understanding of the amount you will need.
interfacing – again, consult your pattern
buttons (4 to 6, I used 5 for this shirt)
scissors
imagination 😀

Start by choosing the size pattern you will make.  Last time I did a size 3 for my son.  It fit but just barely so I made a size 5 this time to give him some growing room.  I then decided to use red as the main fabric for his shirt and the black and white skull fabric as the contrast.
P8290009

P8290010

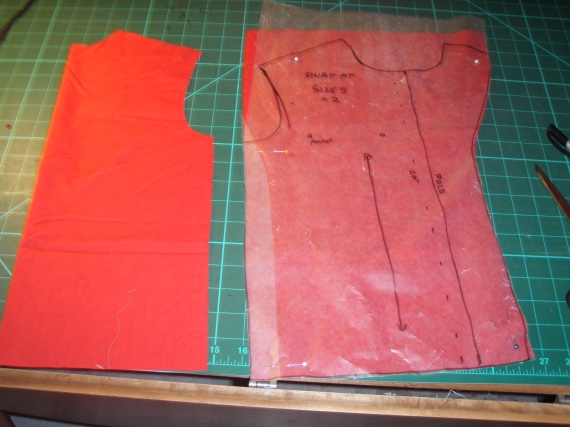
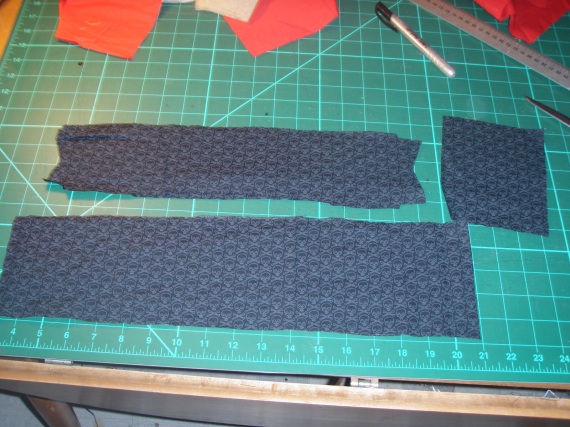
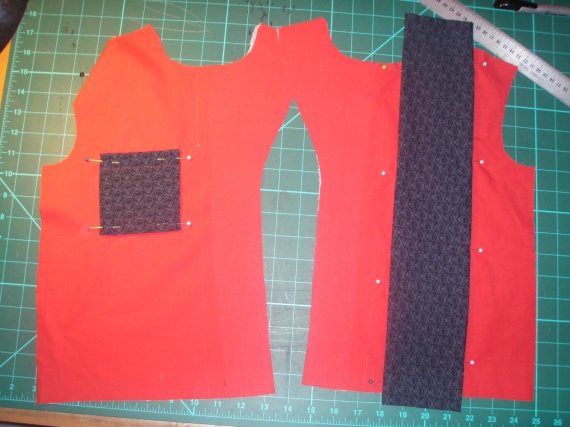
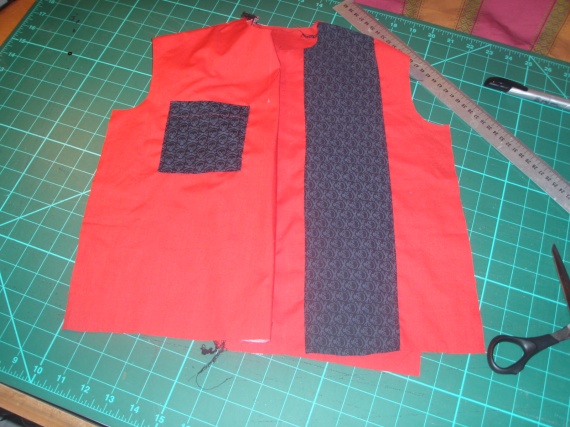
I traced out the pattern pieces I needed onto waxed paper since I plan to use the pattern a few more times.  I cut the front, back and sleeves out of the main red fabric.  I cut the collar and pocket out of the contrast.  The thing that makes this a bowling shirt, for me anyhow, is adding a stripe of contrasting fabric down one side of the front.  In order to figure out how much fabric I need for this I measure from the highest point at the shoulder/neck point and down to the hem.  I cut a strip of contrast fabric that length (you can add an inch or two just to make sure) and I cut the width of it about 5cm (2.5 inches) plus 1cm (.25 inches) on either side to turn under.  Depending on the size of your shirt you can make this wider or narrower, it’s really one of those things that is up to you to decided what you think looks best.

P8290011

P8290012

When cutting out your pieces, take note of the direction of the pattern in the fabric, if there is a pattern.  The skulls on my contrast fabric all go the same direction so when I cut the collar, I made sure that the skulls would be facing up when it’s attached to the shirt, same for the pocket.  Since this was a remnant piece I didn’t have control over the amount I got, so the skulls on my stripe actually go sideways.  Ideally, I would have bought enough fabric to cut the stripe so that the skulls were all going up.

Once the pieces are cut out, apply interfacing to your front facings and under-collar.  If you are doing long sleeves with a cuff, you will probably interface the cuff.  Follow the instructions on your pattern for this.  Next step is to add your pocket and stripe to the front pieces.  If you are doing a pocket and it’s not included in your pattern just cut a piece of paper into a square shape or whatever shape you want.  When you have something you like, add seam allowance and cut it out.  You can put your pocket on whatever side of the shirt you like, the stripe will go on the opposite side.

Next turn under 1cm (1/4 inch) of the long sides of the stripe piece to finish the edges.  Position it on the front of the shirt without the pocket and make sure that it is far enough away from the center front that it will not be covered by the buttons.  I could have put my just a little more to the side but it still looks ok.

P8290014

Pin everything in place and topstitch.  I used a contrasting red thread but you can use a matching thread if you like.

P8310017

And there you go!  Finish the shirt like the pattern instructs or however you might normally finish it if you are like me and don’t read the instructions.  🙂

P8310020

Now for the skinny jeans!  Again, this could apply to kids or adult, boys or girls and you can adapt the info to re-construct a pair of jeans/pants you already own.

Things I used for this:
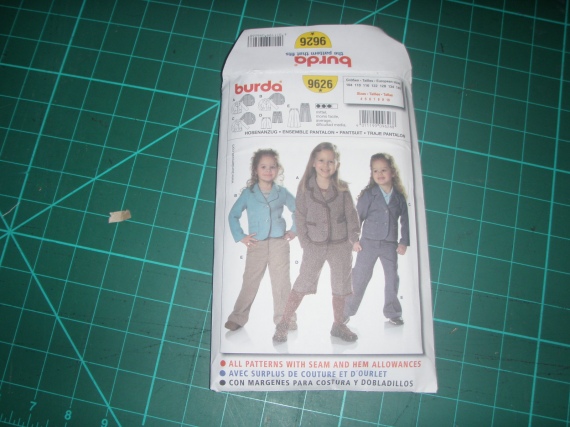
Pant pattern (I used Burda 9626 but any basic pant pattern can work)
Tracing paper
Old pair of jeans (you can use fabric yardage too, just consult the pattern for the amounts you will need)
knee, calf and ankle measurements
scissors
calculator (or lots of paper to write out your math equations. 😀 )

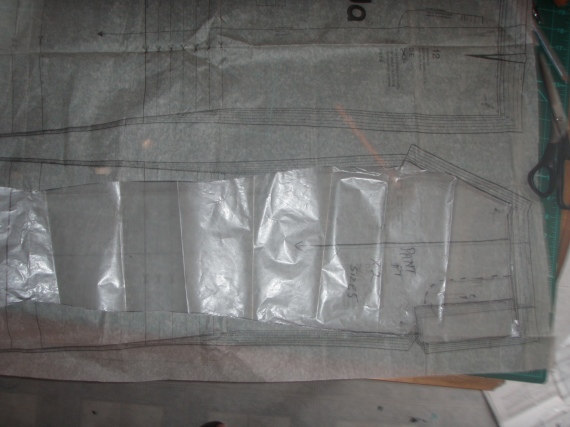
I chose the pattern size that closest fit my daughters hip measurement.  I then measured her knee, calf and ankle and wrote those down so I wouldn’t forget.  I traced out the pattern pieces I needed using waxed paper.  Wax paper is cheap and perfect size for most patterns I need to trace but you can use any transparent paper you have around, I’ve used old patterns that I know I will never use again.

P8260001

Next I prepped my jeans.  I cut up the leg seams and crotch seam.  I was careful to cut out the zipper so that I could re-use it.  I also took off the back pockets to reuse.  I planned to reuse the waistband as well but the button wasn’t in good condition so i used the waistband off of another old pair of jeans I had.  I pressed each piece flat and then I prepped my pattern.

Here’s my math.  To determine the width I wanted around the knee I added 2.5cm (1 inch) to the measurement I took.  I then divided that number in half.  I measured across the knee of the pant pattern front and subtracted the knee measurement I had just determined.  I can’t remember my exact measurements but for example, if the knee measurement was 20 cm (8 inches) then I added 2.5cm (1 inch) to total 22.5cm (9inches) for the knee.  Half of that would be 11.25cm (4.5 inches).  If the front pant pattern knee measurement was 20cm (8 inches) then you would subtract 11.25cm (4.5inches) from 20cm (8 inches) to get the difference of the two knee measurements.  Therefore I would need to remove 8.75cm ( 3.5 inches) from the knee.  Divide that number in half to get the amount to take off equally on each side (4.5cm (1 3/4inches).  Do the same for the calf and ankle measurement.  Mark on the traced pattern the amounts you need to remove from the sides to get a close fit and redraw your side seams.  Do this for the pant back as well.Make sure to re-add seam allowance.  If the fit isn’t close enough when you are finished you can always take it in some more.

P8260004

I forgot to take pictures of the rest but basically what I did was laid out my front pattern on my jeans front matching the finished hem with the actual hem on the jeans.  I then did the same for the back.  I re-cut the pockets to fit the new smaller jeans and re-used the original jeans zipper.  I cut new belt loops and re-used the waistband from another pair of jeans.  I cut it to the length of the waist of the jeans, keeping the original button and making a new button hole.

Here’s the finished pair (these are a size 5 for my daughter).

P8240100

P8240101

Some thoughts on the skinny jeans:

-you may want to measure around the ball of the foot to make sure that the foot will fit through the ankle opening.

-I decided to distress the jeans a bit so I made use of a cheese grater, sandpaper and my scissors to create holes and worn spots.

– if you are wanting to make regular jeans into skinny jeans you can use the same math as above but subtract the difference in measurement directly from the jeans.  You can also put the jeans on inside out and pinch and pin out the excess.

-I had to add elastic to the back waist.  You can do this by cutting  slits in the inside waistband at the side-seams, making sure not to cut right through both layers of fabric.  Insert a piece of elastic and secure with stitching at one side.  Draw up the elastic to the whatever you need and secure the other side. tuck in the elastic ends and whipstitch the openings closed.  See my post about cut offs for the little lady to see pictures of this.

Remember Grade 9 Math? (a quick refresher and tute)

Me neither.  So when I decided to make hats for the kids I found myself pondering the mystery of pi.

Tools for this project:

a calculator or you can be brave and do this on paper
marking pencil
ruler
paper
old pair of jeans and/or some fabric scraps (you need about .5 meter of two different fabrics, one for the outside of the hat and one for the lining)
scissors (both paper and fabric)

First things first, measure the head of the person you are making the hat for.  I was making one for my son and one for my daughter.  Their heads both measured 20″ (50cm).

Write that number down for reference.  Next, using your calculator (or your significantly superior brain if you are doing this on paper) and divide that number by 3.14 (pi).  This will give you the diameter of the circle for the top of the crown of your hat.  I remeasured my circle circumference just to check and it was pretty close, but I suggest remeasuring before you continue to make your patter pieces just to make sure.

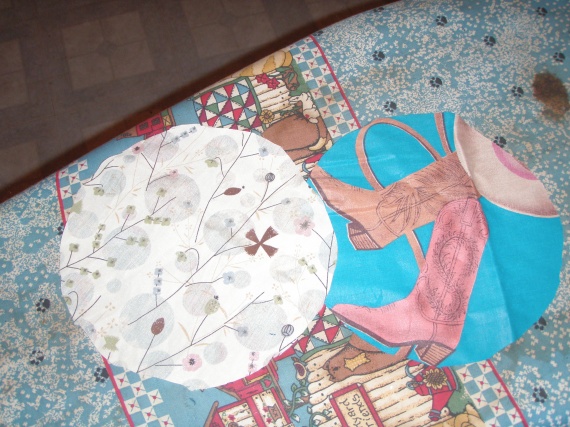
To make the circle for the crown top, I took my piece of paper and marked a dot in the middle, this is the middle of my circle.  If you happen to still have your old geometry set from high school (or may be you kids have one) you can use the compass to draw your circle.  If you don’t, just use your ruler, place ‘0’ on the dot and keep moving it around to create your circle.  Don’t forget to divide your diameter in half so you get the radius, otherwise you will make the circle too big.

Here’s my math:  20″ divided by 3.14 equals 6 3/8″ diameter (radius = 3 1/8), or 50cm divided by 3.14 equals 16cm diameter (radius = 8cm).
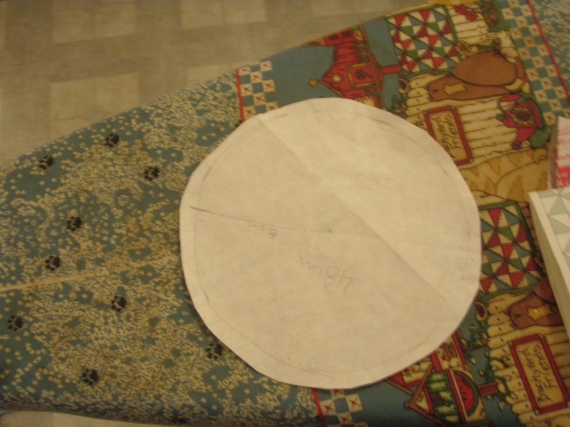
P7110018

I added about 1/2″(1 cm) seam allowance.

Next I made the pattern for the crown.  The length is going to equal the circumferance of your circle and the width can be whatever you want it to be.  My measurements worked out to this: length equals 20″ plus 1″ seam allowance (50cm plus 2cm seam allowance).  For the width I measured 3″ (7.5cm).
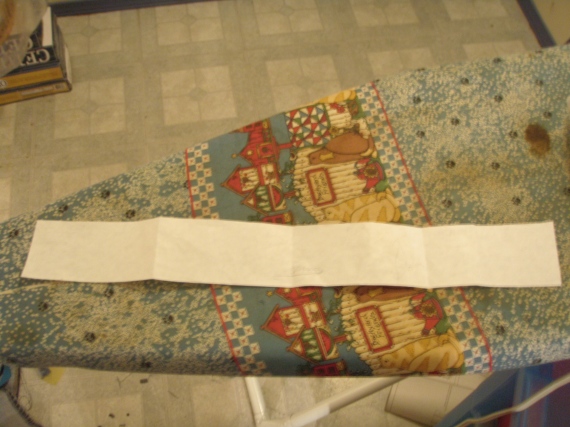
P7110019

For the brim I cheated a little to figure out the measurment.  I have a chart in my college drafting book to help figure out meausrments for circles.  Here’s a little exerpt that should help you with figureing your own measurements. This is in inches.  I’ll explain converting inches to centimeters at the end of the post.

distance covered          1/4 circle          1/2 circle          3/4 circle          full circle
18                                         11 1/2                 5 3/4                  3 3/4                   2 7/8

19                                         12 1/8                6 1/8                    4 1/8                   3

20                                        12 3/4                6 3/8                   4 1/4                    3 1/8

21                                        13 3/8                 6 5/8                   4 1/2                    3 3/8

22                                        14                         7                            4 5/8                   3 1/2

23                                        14 5/8                 7 1/4                    4 7/8                  3 5/8

24                                        15 1/4                 7 5/8                   5 1/8                    3 3/4

25                                       15 7/8                 7 7/8                    5 1/4                   3 7/8

So I’m sure you are now wondering how the heck to use this chart.  Get a large piece of paper and mark the center of one edge.  I used the 1/2 circle since I was aiming for a not too floppy brim.  In the first column for distance covered I looked for the measurment that matched the circumference of the hat crown (20″) and then looked at the 1/2 circle measurement since I didn’t want a brim that was too floppy but not too straight.  The radius for the inside of my brim would then be 6 3/8 inches.  On the paper, using the mark you made as the center point, use your compass or ruler to measure the radius.  You should have drawn a half circle.  This is the inside of your brim and should match the circumference of the crown.  Don’t forget to draw in 1/2 inch (1cm) seam allowances.

Next I decided how wide I wanted my brim and marked down another 3 inches from the inside of the brim.  Again, dont forget to add seam allowance.
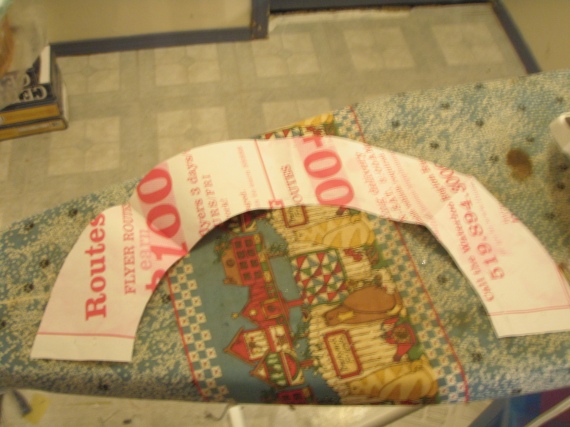
P7110021

So you should have the three pattern pieces needed to make the hat.  I cut out two sets of each pattern piece, for each hat.  The first set I cut from an old pair of jeans for the outside of the hat.  The second set I cut from a scrap of cotton fabric for the lining of the hat.
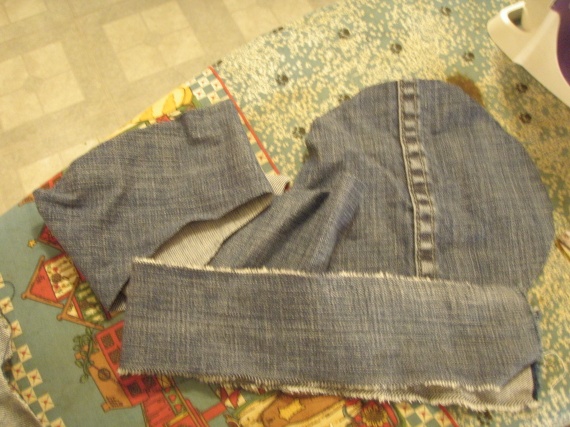
P7110023P7110024

Next I put the brim pieces together.  Fold your brim in half, right sides together and stitch across the end.  Do this to the brim lining piece as well.  Press the seam allowance open or to one side.
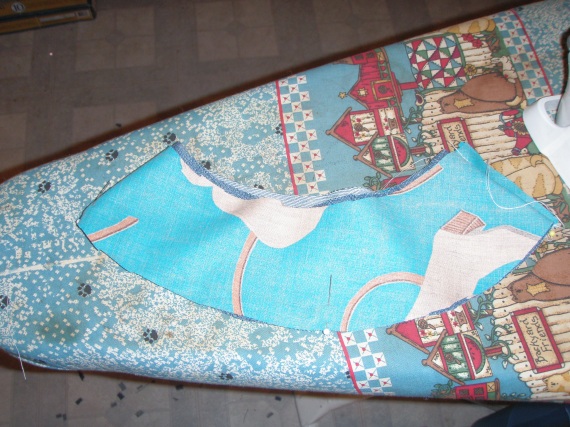
P7110027

Place your brim and brim lining together, right sides, and stitch around the outer edge.  Clip the seam allowance, turn right sides out and press.
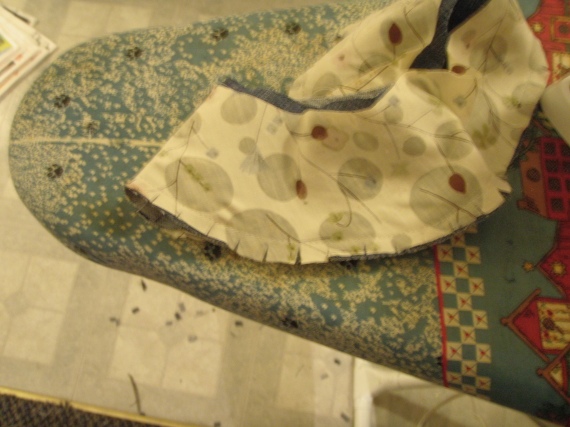
P7110030

I topstitched around the edge after pressing.
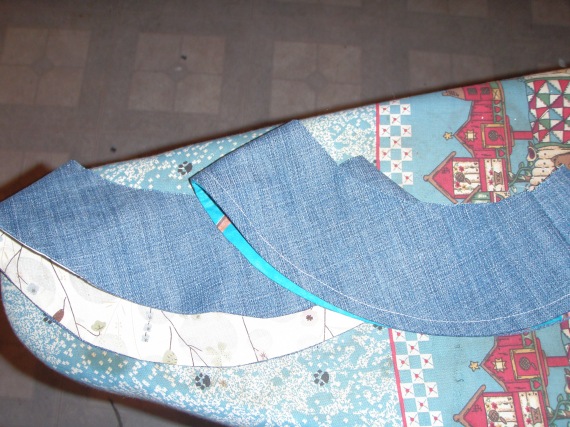
P7110034

Next I took the crown piece and folded it in half, right sides together and stitched the ends.  I pressed the seam allowance to one side. Do this with the crown lining as well.
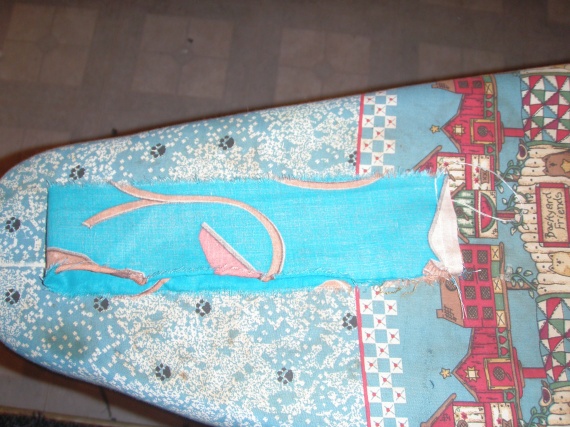
P7110025

I marked the crown in quarters using pins and marked the crown top in quarters as well.  I then pinned the crown to the crown top, matching the markings.  I stitched the two pieces together and then did the same with the lining pieces.
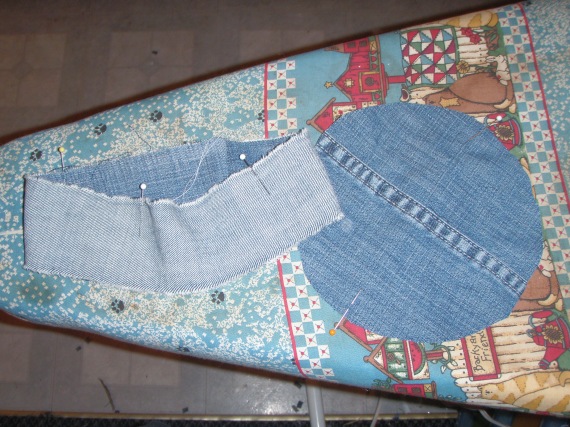
P7110035

You can clip if you want, I didn’t find it necessary though and I just pressed the seam allowance down.

Mark the crown in quarters again and mark the inside brim edge in quarters.  Put the two pieces together and stitch around.  I trimmed the seam allowance to even it up but you don’t have to do this.

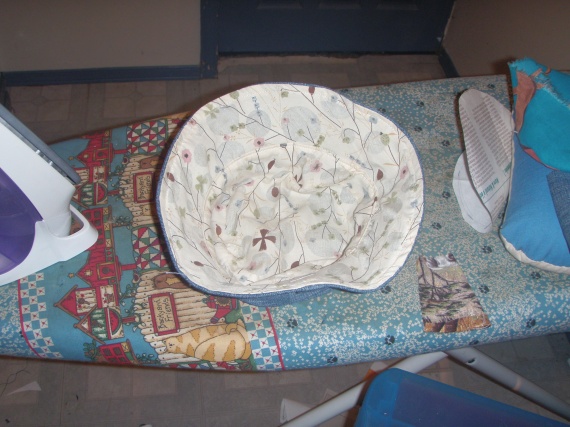
Next I wanted to put the lining on in a way that reduced the amount of hand stitching I might have to do.  So I marked the crown lining in quarters and marked the inside of the hat in quarters again.  I put the right sides together and pinned it at the markings.  The hat should be completely inside the crown lining.  I stitched around the edge and left an opening so I could turn it out.  After pressing I was going to hand stitch but then I got an idea that would eliminate all hand sewing. 🙂
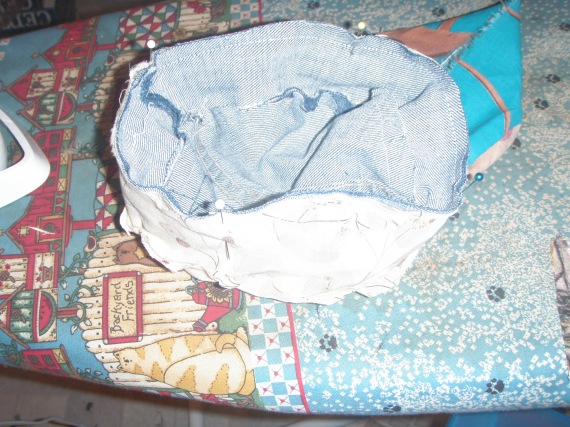
P7110101

I turned in the seam allowance on the opening and pinned it closed.  I then edge stitched around this seam line from the outside.  This closed the hole in the lining, keeps the lining from flipping out and looks nice.  yay!
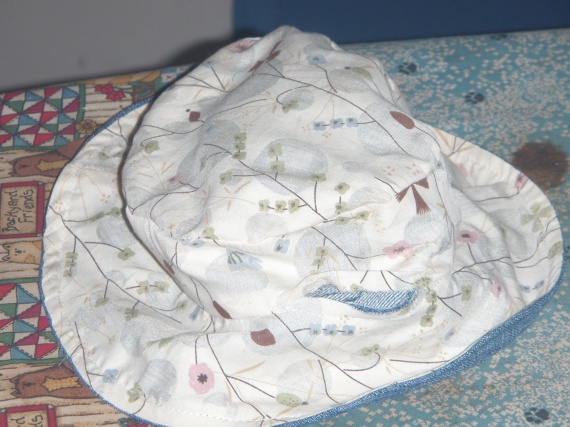
P7110105

P7110106P7110107P7110109

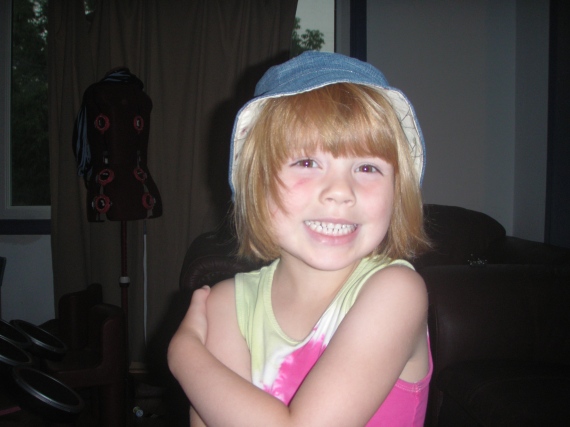
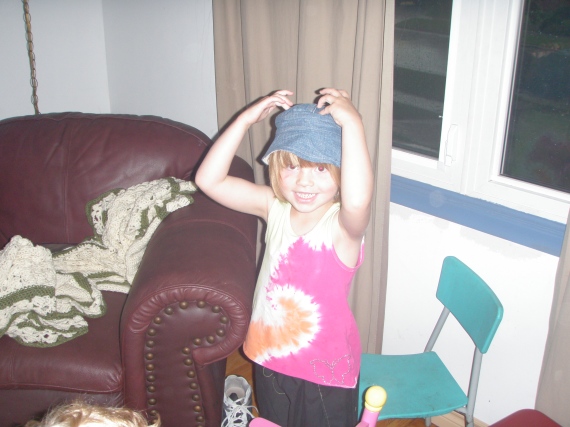
Finished hat!

Some thoughts on this project:

I might consider making the crown a little wider, maybe 4 inches.

You can do decorative stitching on the brim, add eyelets for vent holes, put pockets etc.  This is such a basic hat.

If you want a floppier brim, use the measurment for the 3/4 or full circle and you can make the brim wider too.

If you are using a lighter weight fabric for your hat, you may want to consider using a stiff interfacing to give it some body.

How to convert inches to centimeters.

Basically 1 inch equal 2.5 centimeters.  So to convert from inches to centimeters, simply multiply by 2.5.  To convert from centimeters to inches, divide by 2.5.  simple.  When dealing with fractions for inches  you simply divide the top number by the bottom one but here are the decimals to make things easier.

1/8″ = .125,   1/4 = .25,   3/8 = .375,   1/2 = .5,   5/8 = .625,   3/4 = .75,   7/8 = .875
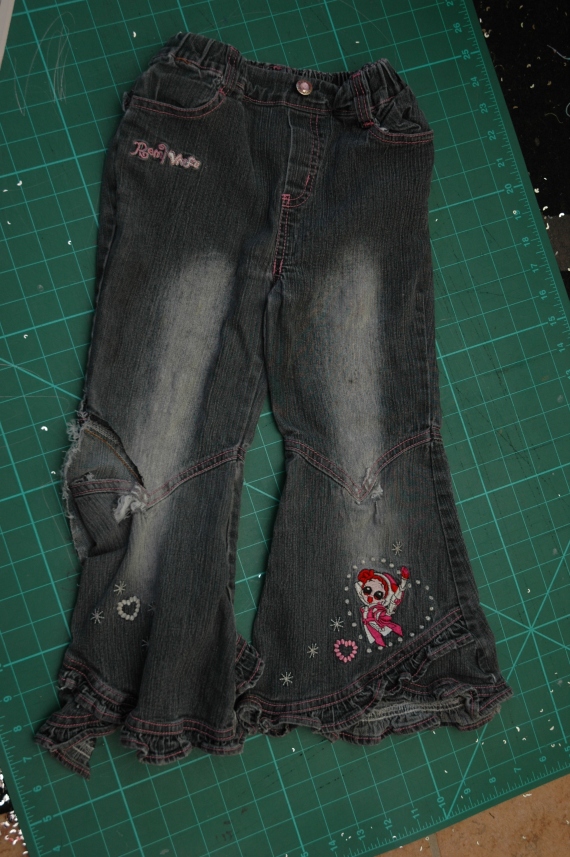
T-shirt sleeves into shorts and a t-shirt scarf, mini tute

A few weeks ago I agreed to do a pay-it-forward gift exchange.   A friend had posted a note on their facebook profile that the first five people to leave a comment would receive something handmade by her.  The deal was there was no set deadline, but it would be within the year, no set value and no notification of when or what was being sent.  It could be something crafted, it could be a box of cookies or a full on meal.  The only stipulation was if you left a comment that you had to re-post the note on your profile and agree to do the same for the first 5 people who commented and so on.
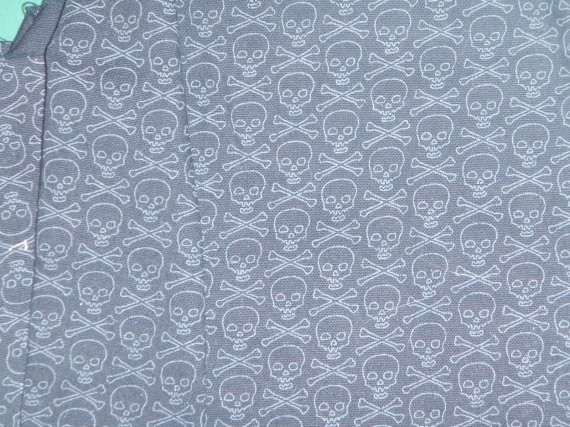
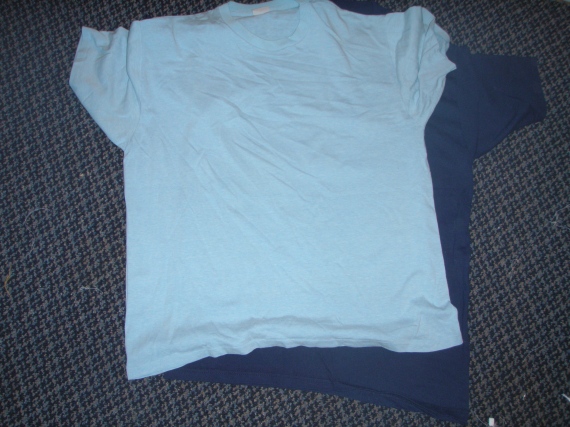
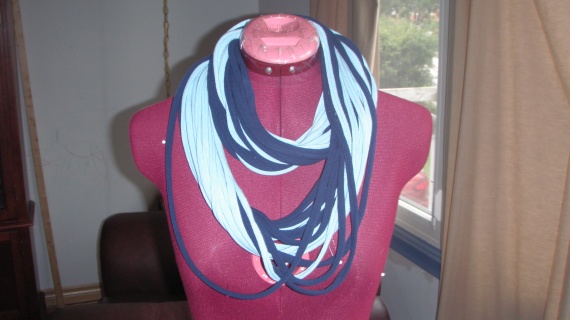
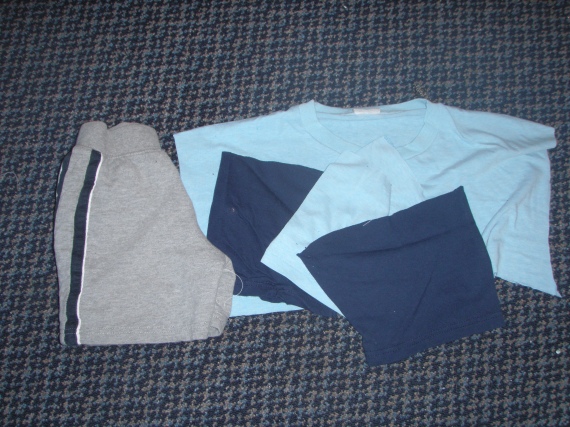
I really didn’t know what to make and then I came across a tutorial on This Old Dress.  I didn’t want to buy anything new to make my PIF’s so I dug in my sewing closet (yes I actually have to dig in there) and pulled out two t-shirts to use.  The original tute shows how to decorate the fabric with fabric paints to create more interest but I didn’t have the time or motivation (or paint for that matter) to do that so I chose a navy blue and light blue tshirt and figured the two together would make it interesting enough.

P6240008

For this project you need one or two tshirts, the bigger the better, depending on how full you want your neck lush to be.  You can use tshirt fabric for this too, just sew up two rectangles with a zigzag stitch to create a tube.

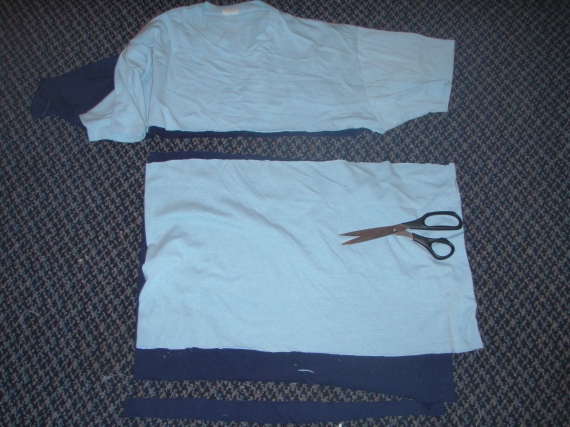
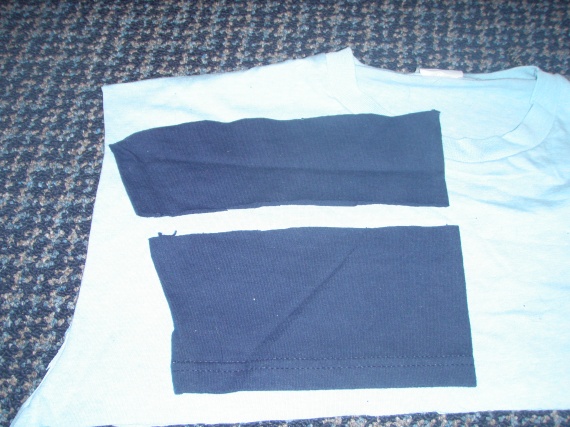
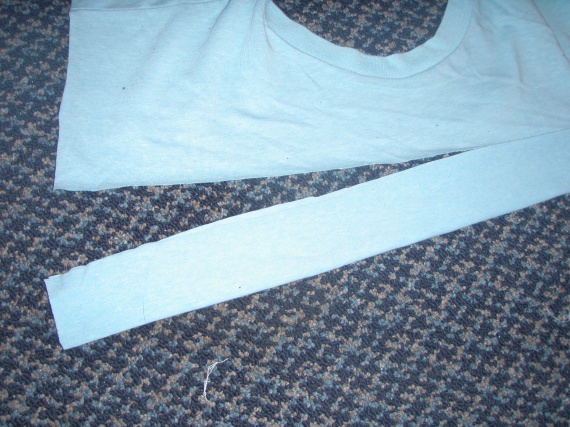
Lay out your tshirts flat.  cut off the hem and cut off the body portion just at the underarm point.

P6240009

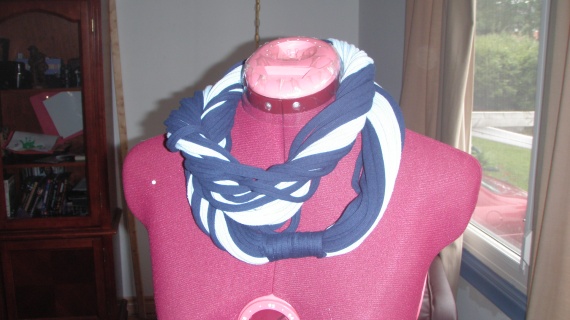
Set aside the top portions of the shirts for the next tutorial and hang on to the bottom hem pieces.  Cut the two body portions of your t-shirt into horizontal strips so that you have loops.  I cut mine about 1″ (2.5cm) wide.  Next come the easy part, take each loop and give it a good stretch.  The fabric should curl up and almost double in length.  Once you have stretched all your loops you will want to tie them together.  Hold all the loops in one hand and wrap one of your hem pieces around the bunch and tie a knot.  And that’s it!   fun, super soft, versatile scarf.

P7030001P7030003

Some thoughts on this project:

The bigger your t-shirt, the longer your loops will be, the more you can do with your scarf.

This will work best with cotton t-shirts (or cotton knit fabric from the fabric store) as it will stretch out and stay stretched out.  Any amount of spandex/lycra in the fabric will simply cause it to shrink back up to its original size.

Experiment with painting and dying your t-shirts to create a little interest in the finished product but do this before cutting your t-shirt in to strips.

If you sewed a piece of fabric into a loop for this project, be sure to wrap your hem piece (or extra strip of fabric) around the seamed area to cover it as it doesn’t look the nicest.

Now that you have finished your fun scarf and are looking pretty trendy right now, what do you do with the leftovers?

You can cut the sleeves and upper body portion of your shirt into strips and make some bracelets or whatever but if you have a toddler hanging around your house (or maybe one or two hanging out at your friends or family’s houses) make a pair of one of a kind shorts!

For this project I used the sleeves from the two t-shirts I make my tshirt scarf out of.  I also used a pair of my son’s shorts as a guide.

I used two sets of sleeves for this as I felt that one set would be a bit too short.  it really depends on the length of the sleeves of your tshirt so use your own judgement.

P6240010

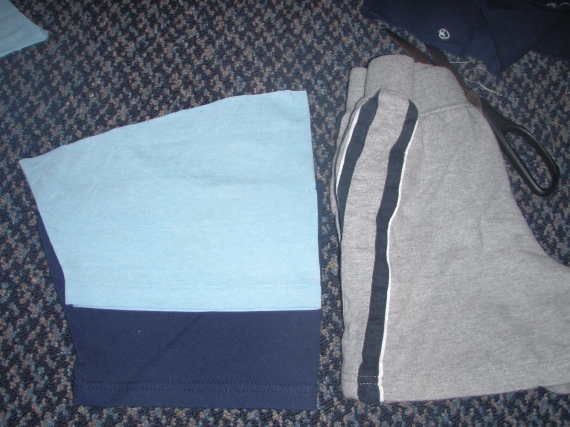
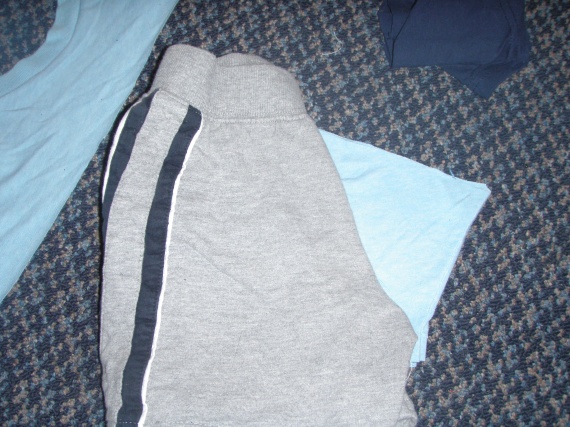
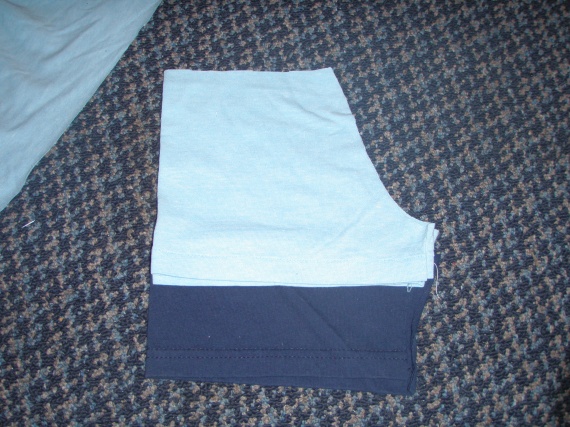
I laid a light blue sleeve on top of the dark blue sleeve and used the ready-made shorts as a guide for length.  I then trimmed off the excess fabric from the dark blue sleeve making sure to leave it long enough to attach to the hem of the light blue sleeve.

P6240011

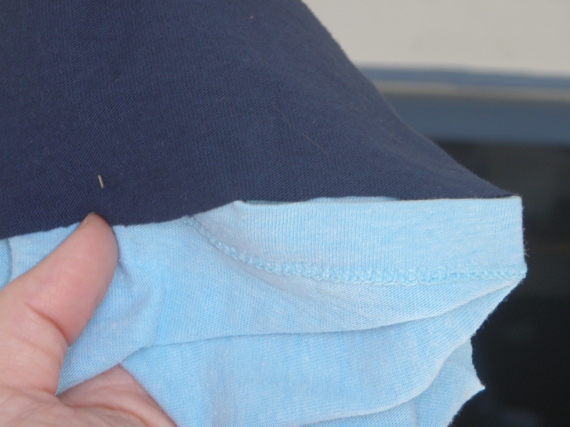
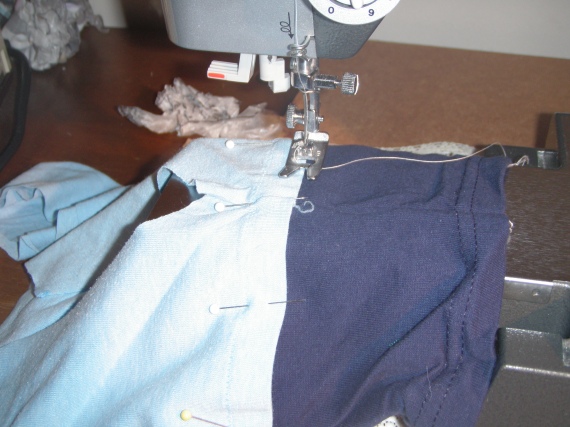
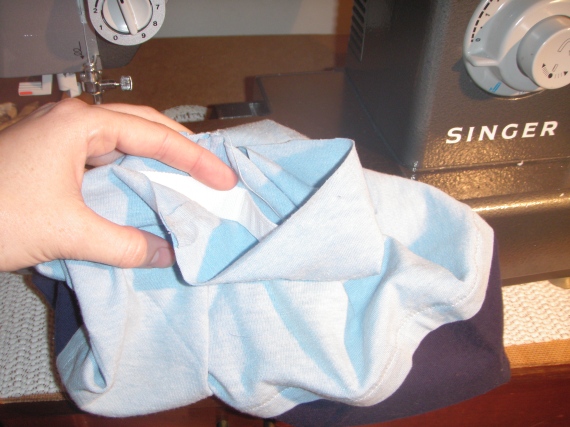
I then tucked the dark blue sleeve into the light blue one, lining up the cut edge with the edge of the hem inside the light blue sleeve.  Then I stitched over the hem stitch line of the light blue sleeve, catching the dark blue one on the inside, stretching lightly as I went.

P6240014P6240027P6240028

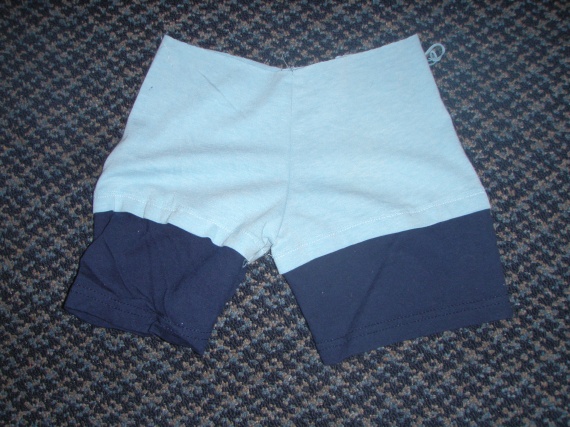
Next I used the ready-made shorts as a guide for cutting the crotch of the new shorts.  Lay the sleeve flat with the underarm seam as the new inseam of the shorts.  Cut the crotch shape.  It doesn’t have to be exact and the front doesn’t have to be different from the back since these are knit shorts.

Sew the crotch seam.

P6240016

P6240018

P6240030

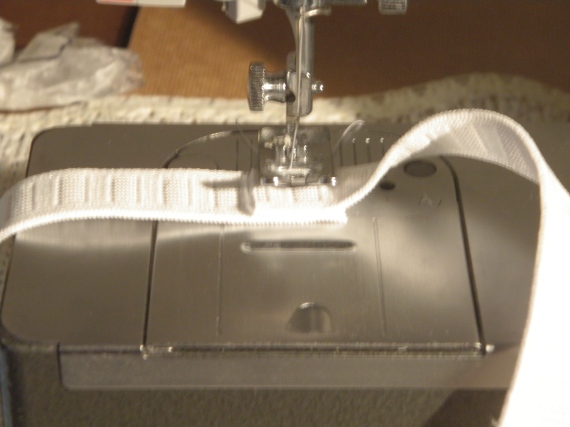
To finish the waist I cut a strip of fabric from the leftover upper portion of the light blue tshirt.  I made it two times the width of my elastic plus seam allowance (approx. 2.5″ since I was using a 1″ elastic.) and the same length as the waist of the shorts.  I cut a piece of elastic to fit my son’s waist and stitched the ends together to form a loop.  I stitched the strip of fabric together to form a loop and folded it over the elastic.  I then stitched the encased elastic to the shorts making sure to stitch only through the fabric and not the elastic.

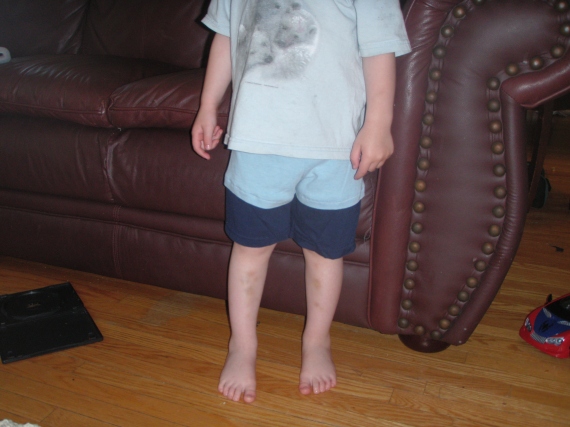
And then just trim the threads and put on your favourite toddler!

P6240034

P6240015

P6240036

P6240037

P6240038

Some thoughts on this project:

if the sleeves are long enough you don’t need to double them up.

I realized as I was adding the photo’s that I cut the crotch before I added the other sleeve to add length.  There really is no right or wrong way to do this, it’s all about getting the finished product. lol!

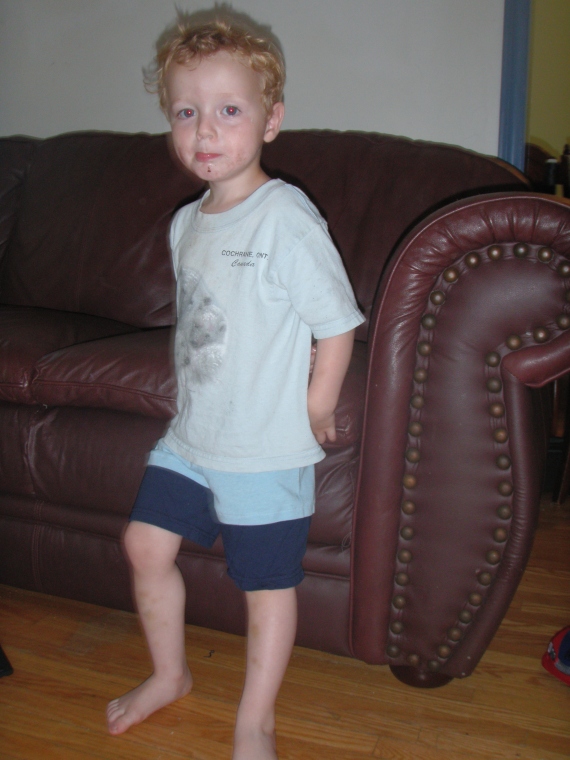
You may want to wash the face of the toddler you give your shorts to before taking their picture.

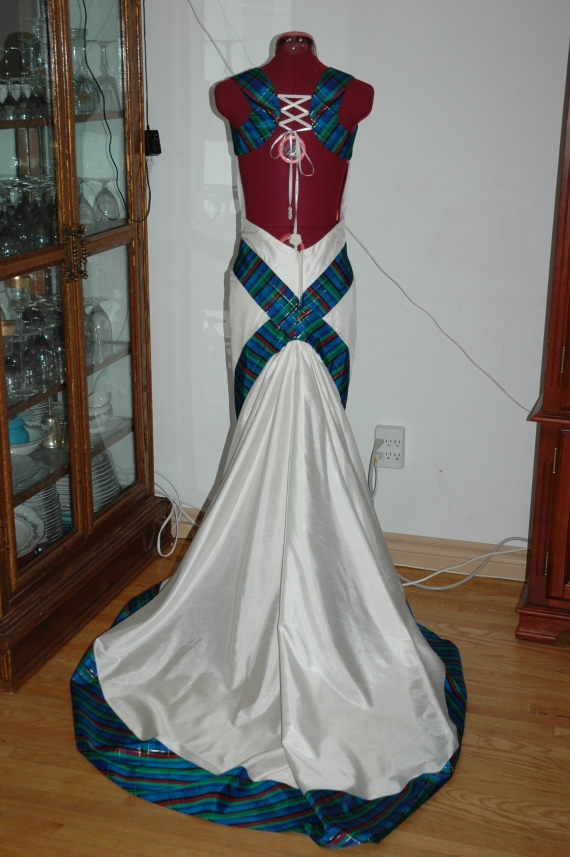
Completed wedding dress!

Yay! I’m finished!  Now I need to get the dress dropped off before Friday night and keep my fingers crossed for a positive outcome from the competition.  🙂

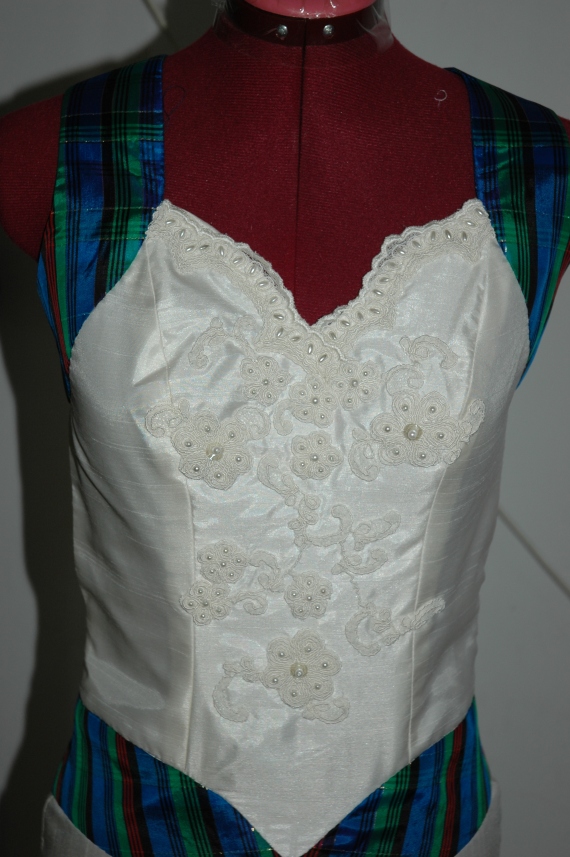
I encountered a few snags, some I overcame and some I have to live with.  There were quite a few pick marks and tiny holes that I couldn’t do anything about.  They don’t detract from the dress and are not noticeable (except to me, anyhow) so I left them.  It would have been too awkward to cover them.  I did have to deal with the couple of stains on the bodice, I couldn’t ignore them.  I added lace to the bodice and added some of the beads and sequins I took from the original lace.  It wasn’t a mirror image design in the lace so I couldn’t make a perfectly symmetrical design from the flowers.  I opted to try for more of a non-specific design and I hope it doesn’t appear as though it was just added for the sake of adding it.

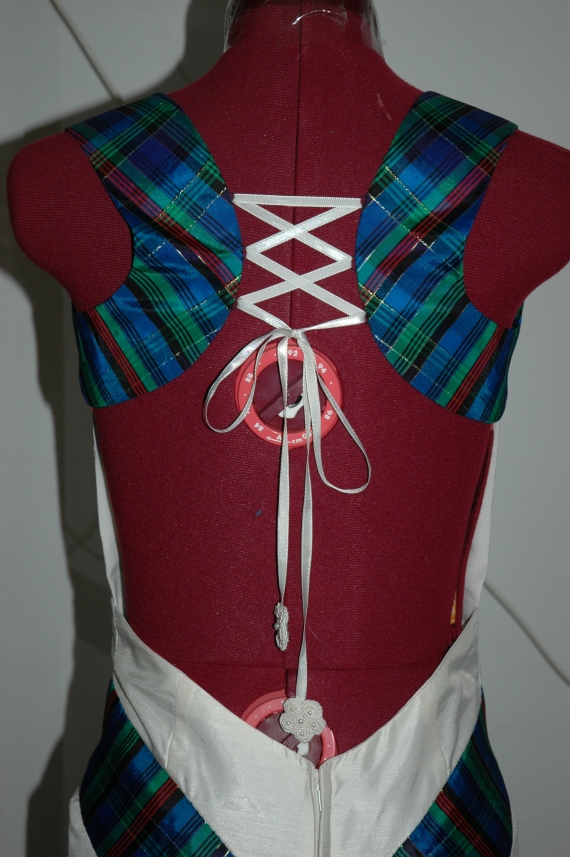
I had had an earlier problem of the sides of the dress sticking out.  I’ve somewhat solved the problem by removing the armhole thingys and re- attaching to take up the slack.  I think it is more of a design problem though and in the future I will probably take a different approach to the whole backless dress idea.

I also had originally made some really pretty organza flowers that I wanted to put on the dress.  I had added a cluster on the bodice, a cluster at the top of the train and one of the ends of the ribbon ties.  However, I found that they just didn’t fit.  Once I removed them, the dress seemed ‘finished’ so I’m happy to share the results.

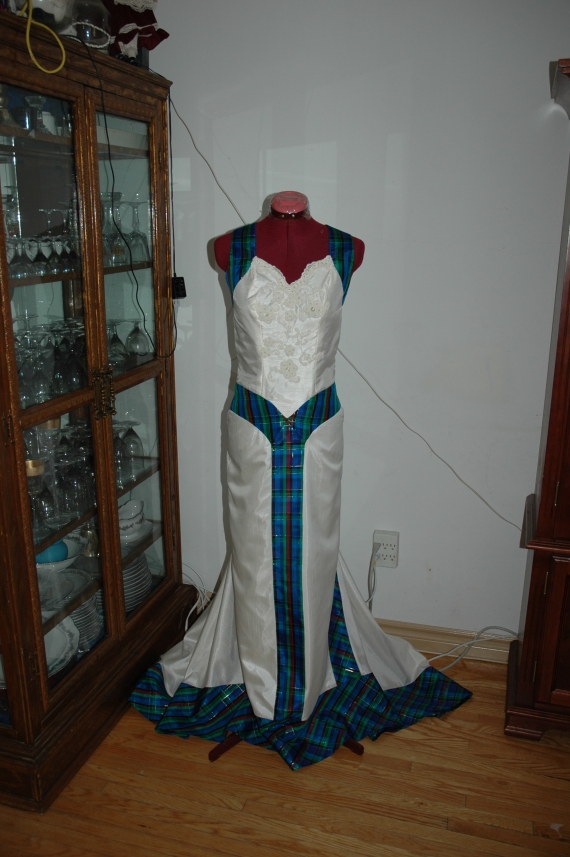
Dress Front

DSC_0047

Detail of Dress Front

DSC_0045

Dress back

DSC_0041

Detail of armhole thingys and the lacing. 😀

DSC_0043

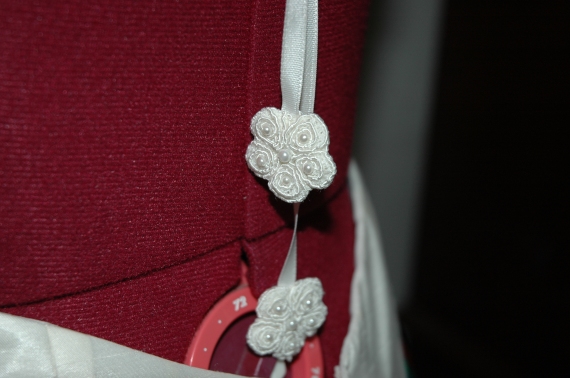
Detail of lace flowers on end of ribbon ties.

DSC_0044

If all goes well I’ll have some professional photos of the dress to show you. 😀  Wish me luck for the competition!

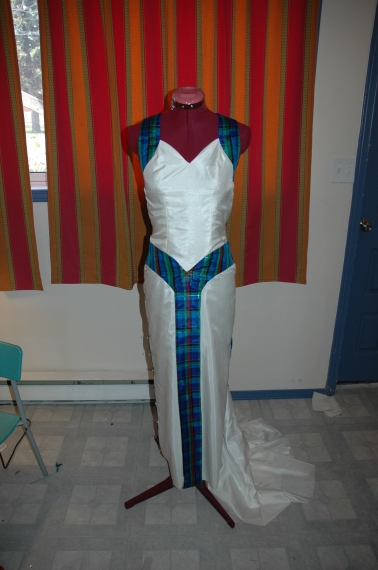
Dress Update #4

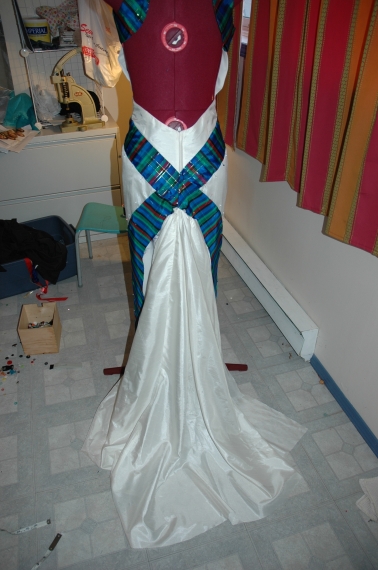
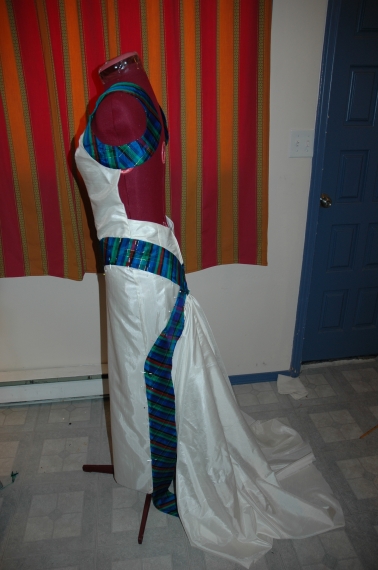
I’ve hit a mild snag.  I have the plaid fabric on the dress and will be able to put the train on very soon.  I was having some trouble with the zipper.  First it was a bit short which meant that the wearer would have wiggle a little to get in.  Then there was an issue with how I put it in.  I tried to do a centered zipper but found that it didn’t really look that nice and also noticed that the back had stretched a bit, causing some gaping.  So I made some adjustments to give allowance for a longer zipper and reinforced the back so it wouldn’t stretch.  The plaid fabric just needs to be stitched on, by hand, now.

My snag is that now that everything is just about together I’ve noticed that the sides of the top are not sitting right.  I’m not sure how to fix this at the moment, I’ll have to think about it.  Right now my focus is to get the plaid fabric and the train on.  I have just over one week left to finish this dress in order to get it into the competition.

dressfront

dressback

dressside